Attributes
Attributes allow you to add information about resources, Apps, and services. This may include information intended for the user and/or data to be used by the shell, such as the firmware version of the physical device or cloud provider to be used for App deployments. CloudShell components inherit the attributes defined in their family and model. For example, a router resource has the Port attribute defined in that router's model.
Components based on 2nd Gen Shells inherit their settings from their Shells. For additional information, see Shells Overview.
Creating an Attribute
To create an attribute:
-
Click the Admin ribbon.
-
In the Configuration section, click Attributes.
The attributes list is displayed.
-
To add a new attribute, in the toolbar, click Add.

-
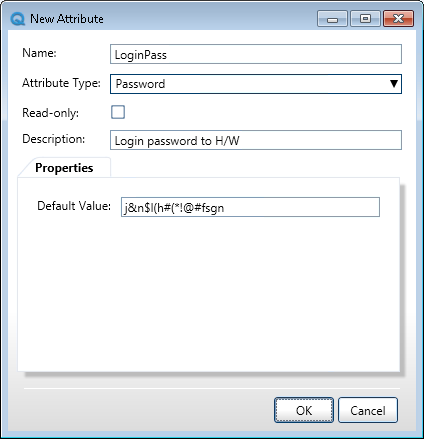
Enter the following information:
| Attribute | Description |
|---|---|
| Name | Enter the attribute name. The name field is mandatory. Attribute name must begin with a letter and can contain alpha numeric characters, spaces and underscores. |
| Attribute Type | Select the attribute type from the drop down list. There are five types of attributes: String, Password, Numeric, Boolean (Yes/No), and Lookup. For additional information, see Attribute Types and Values below. |
| Read-only | Select this check box to prevent this attribute from being edited by the user. |
| Description | Enter a description of the attribute. Add keywords to help identify the attribute and to use as search criteria. |
| Properties | Enter the required property values. Specify attribute values and default values. Each attribute has its own set of attributes |
- Click OK.
Attribute Types and Values
There are five types of attributes: Boolean, Numeric, Password, String and Lookup.
The following table explains how to configure each attribute type:
| Attribute Type | Description | Valid Values |
|---|---|---|
| String | In the Default Value field, specify the initial attribute value and clear the Read-only check box. | alphanumeric characters |
| Password | In the Default Value field, specify the initial attribute value and clear the Read-only check box. Password text is displayed as hidden characters in functions. | alphanumeric characters |
| Numeric | In the Default Value field, specify the initial attribute value and clear the Read-only check box. | numbers |
| Boolean | In the Default Value field, specify the initial attribute value and clear the Read-only check box. | True/False |
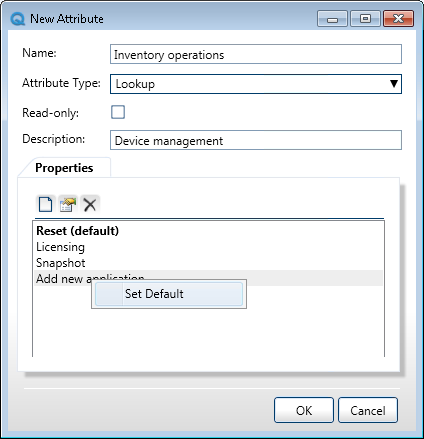
| Lookup | Click the Add lookup value icon to specify a list of values. To add lookup values, click the Add lookup value button in the Properties area. It is possible to add only String lookup values. note The first added value automatically becomes the default. To specify a different value as the default, click it and select Set Default.
| list of values |
By default, all attributes are of type String. To change the type, select another type from the Attribute Type dropdown list.
Defining attribute rules
Attribute rules allow administrators to define different behaviors for attributes in the application.
To assign rules to an attribute:
-
Click the Admin ribbon.
-
In the Configuration section, click Attributes.
The attributes list is displayed.
-
Select an attribute from the list and click the toolbar's Rules button.
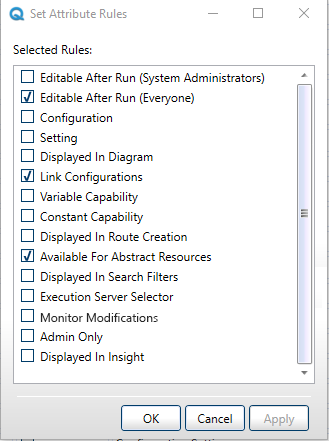
The Set Attribute Rules dialog box is displayed.
-
Select the required rules.

-
Click OK.
The following table details the attribute rules:
| Rule | Description |
|---|---|
| Configuration | Displays the attribute in the resource's Configuration tab in Resource Manager Client, for resources associated with the family or model. Configuration attributes are visible only to admins. |
| Setting | Enables any user that can view the resource to view and/or edit the attribute's value. In addition, attributes with this rule are displayed as filters in the search window in CloudShell Portal (both in the Add Resources pane and Inventory page). Displays the attribute in the Resource Manager Client's Settings tab and in CloudShell Portal. For example, in the Attribute drop down list of the Advanced Search (if the attribute has a value), and in the blueprint/sandbox diagram's Attributes pane for resources associated with the family or model. |
| Displayed In Diagram | Displays the attribute on the resource box in the blueprint and sandbox diagrams in CloudShell Portal and in the domain tab's Diagram page in Resource Manager Client. By default only the resource name, address and model are visible in the diagram. |
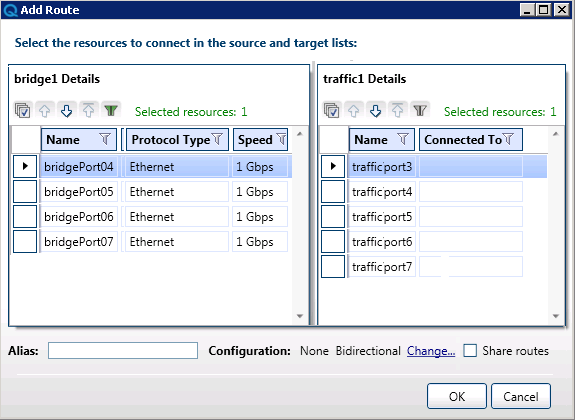
| Link Configurations | (Applies to L1 routes) Displays the attribute in the Inventory tab of the Resource Connections dialog box and in the Connection Properties side pane. This enables users to specify a specific attribute value (such as Speed) that will apply only to this specific route when it is connected in a sandbox. For details, see Configure Physical Network Connectivity Requirements. |
| Variable Capability | Defines an attribute with a number of potential values which should be taken into account when searching for a possible route. The final value is ultimately set by the system. |
| Constant Capability | Defines an attribute that has a specific value which should be taken into account when searching for a possible route. |
| Displayed in route creation | Displays the attribute as an additional column in the Resource Connections dialog box. You can use Displayed in route creation attributes to ensure that all ports in a route have the same protocol type and speed.
|
| Available For Abstract Resources | Only attributes with the Available For Abstract Resource rule are available as possible requirements or additional information when creating or editing abstract resources. |
| Displayed In Search Filters | Enables CloudShell users to search CloudShell elements by specific attribute values. |
| Execution Server Selector | Enables admins to limit the execution of a resource or App to a specific execution server (or group of execution servers) instead of just using the first available execution server. For more information, see Setting Up Execution Servers to Run Commands. Notes
|
| Monitor Modifications | Enables admins to monitor the value of a specific Numeric attribute/s in real time. This requires setting the |
| Admin Only | Enables only CloudShell admins (domain admins and system admins) to edit the attribute's values in CloudShell Portal. The attribute is still visible to other users, but they may not be able to edit them. |
| Displayed in Insight | Enables displaying attributes in CloudShell Insight BI, enable filtering dashboards data according to attribute values. |
Important: The Editable After Run rules below apply to TestShell Studio and TestShell Runner but are associated to attributes in Resource Manager Client. Once configured, you must associate the attributes to test modules in either Studio or Runner, and enable the privileged user (depending on the rule that is used) to change the attribute's value, either from TestShell Studio or Resource Manager Client, after the test is executed. | |
| Editable After Run (System Administrators) | Enables system administrators to edit the attribute's value. |
| Editable After Run (Everyone) | Enables any TestShell user to edit the attribute's value. |
Displaying attributes in BI
To display attributes in CloudShell Insight BI, and to enable filtering of dashboards data according to attribute values:
- In the Set Attribute Rules dialog box, select the rule Displayed in Insight.
Attribute named "model" will be automatically assigned with the rule Displayed in Insight.
- After setting the attribute rule in Resource Manager, the attribute will be added to the insight database (Table: ResourceAttributesValuesSummary). To use it in BI dashboards you need to rebuild the elastic cube, as explained in Build the Insight ElastiCube.
For performance reasons, the Insight database adds new attributes once every 24 hours, so you need to wait 24 hours before completing the next steps

