Adding a new App Template
When adding a new App template, you need to configure the settings of the virtual machine and application you want to deploy. To add App templates, at least one cloud provider resource must be defined. To define private cloud provider resources, see Private Cloud Provider Support in CloudShell, and for public cloud providers, see Public Cloud Provider Support in CloudShell.
If your CloudShell deployment includes multiple sites, it is recommended to configure the deployment process of the App to be carried out in the domain that is physically closest to the cloud provider. For additional information, see Managing Private Cloud Apps in Domains or Managing Public Cloud Apps in Domains.
- By default, all public cloud Apps of the same type in the same sandbox are deployed within the same subnet and therefore are connected to each other and isolated from other sandboxes. However, using the Subnet service, blueprint designers can set up multiple subnet networks in the sandbox, instead of having one default subnet for all the Apps of the same cloud provider. For details, see Subnet Connectivity.
- Public cloud App deployment requires the management network and subnet(s) to be prepared in advance as part of the sandbox Setup process. CloudShell's out-of-the-box Setup process does this. However, the blueprint must include at least one public cloud App to initiate the Setup script's connectivity preparation process for deployment in that public cloud.
-
Click + Add.
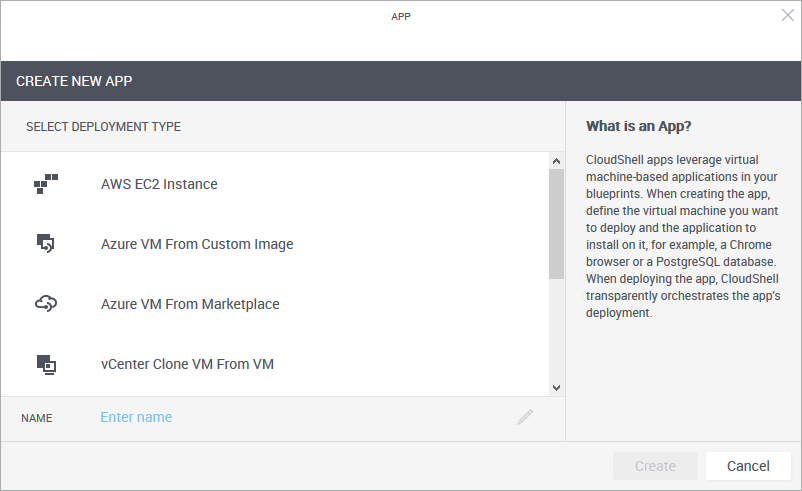
The Create New App wizard is displayed.
-
From the Select Deployment Type pane, select the desired deployment type. For example, "vCenter VM From Template" deploys a vCenter virtual machine from a template while "AWS EC2 Instance" deploys an AWS EC2 instance from an AMI image.
-
Enter a Name for the App template.
noteThe App template's name has a limit of 100 characters and can only contain alpha-numeric characters, spaces, and the following characters: | . - _ ] [
-
Click Create.
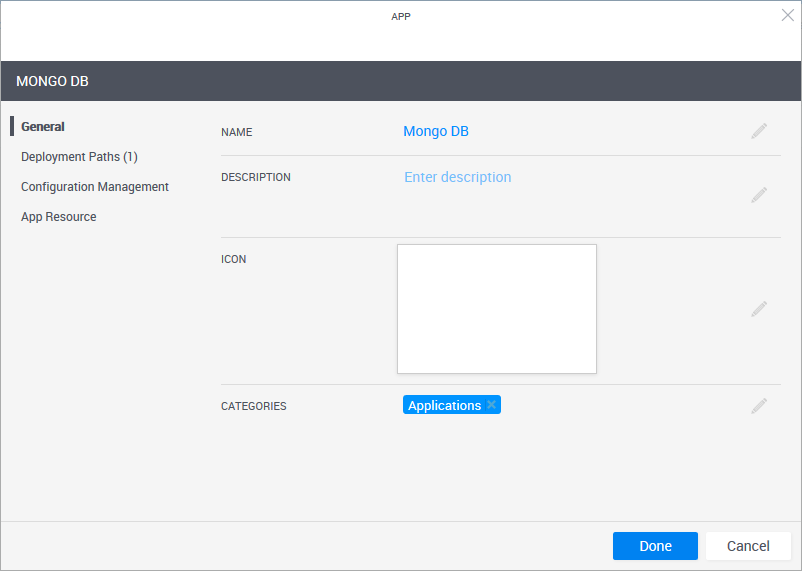
The App template is created and the App wizard's General page is displayed.
-
In the General page, define the App template's display settings and category.
| Field | Required | Description |
|---|---|---|
| Name | Required | App name that is displayed in the catalog. |
| Description | Optional | Description of the App. |
| Icon | Optional | Add an image to the catalog definition. The recommended size for the image is 190x120 pixels (image size is limited to 400x400 pixels or 200 KB). |
| Categories | Optional | Service categories are a method to classify Apps. The Apps are displayed in the Add App / Service side pane in the blueprint and sandbox diagram, arranged in categories. Only users who are permitted to view the category can access the App. Apps without a category are not displayed. By default, the Applications category is selected. Select a category from the dropdown list. You can select additional categories. Examples of categories are: applications, networking and VLAN. Notes
|
-
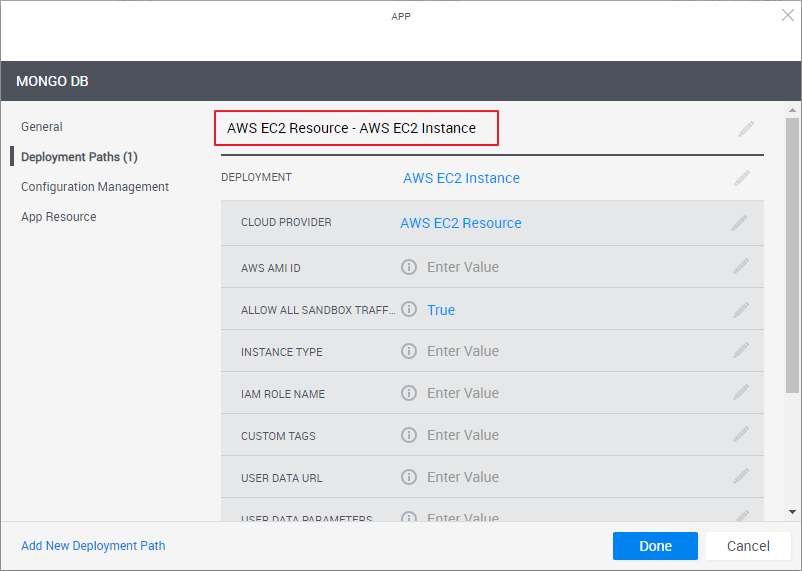
In the left pane, click Deployment Paths and configure the App template's deployment path.
A deployment path consists of (1) the selected deployment type (the method to be used to deploy the VM, for example, from a vCenter VM template or AWS AMI image, (2) the VM’s settings such as storage size, CPU and image file, and (3) the CloudShell cloud provider resource that enables CloudShell to access the cloud provider and deploy the VM on it.
Note the deployment path's name (highlighted in the image below). The path's name is dynamic and consists of the selected Cloud Provider resource and Deployment type. You can change the name of the path by clicking the field.
-
From the Deployment drop down list, select the deployment type.
The selected deployment type's attributes are displayed.
noteDeployment types related to 2nd Gen cloud provider shells include "2G" in the title (for example: "vCenter VM From Template 2G").
-
Enter the required information based on the selected deployment path:
- For AWS EC2 Instance attributes - Read here.
- For Azure VM From Custom Image attributes - Read here.
- For Azure VM From Marketplace attributes - Read here.
- For Azure VM From Gallery Image 2nd Gen attributes - Read here.
- For OpenStack Deploy Glance Image 2G attributes - Read here.
- For vCenter Clone VM From VM attributes - Read here.
- For vCenter Deploy VM From Linked Clone attributes - Read here.
- For vCenter VM From Image attributes - Read here.
- For vCenter VM From Template attributes - Read here.
-
-
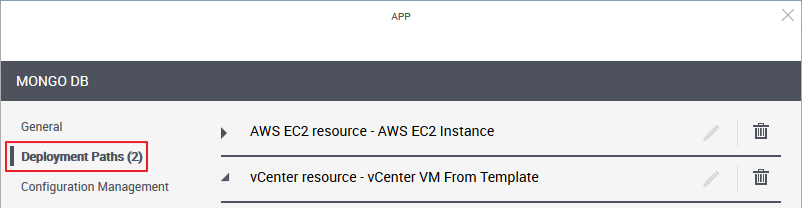
To add additional deployment paths to the App template, click the Add New Deployment Path link at the bottom of the wizard and fill in the required information.
Note that for Apps with multiple deployment paths, the user who adds the App to the blueprint or sandbox diagram will be prompted to select the suitable deployment path to use out of the deployment paths that are based on cloud provider resources in that user’s domain.
-
In the left pane, click Configuration Management and configure the application to be installed on the VM.
Read about the different options here.
-
In the left pane, click App Resource to optionally set the VM's operating system user credentials (for example, to connect to the VM via RDP or SSH). You can also change the deployed App's Shell.
Read about the different options here.
-
Click Done.
The new App template is displayed in the Apps page.