Create a Shared VPC using CloudFormation
The Shared VPC option is supported in the AWS 2G shell and enables you to deploy sandboxes to an existing VPC.
Prerequisites:
- Successfully deployed 0_Main.yaml stack
To create a Shared VPC:
-
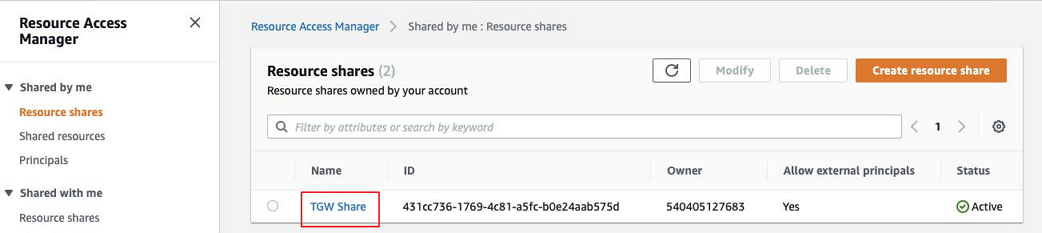
Add a principal for the TGW Share resource share.
-
As an admin, open your AWS management account.
-
Open the Resource Access Manager dashboard.
-
Click the TGW Share resource share.
-
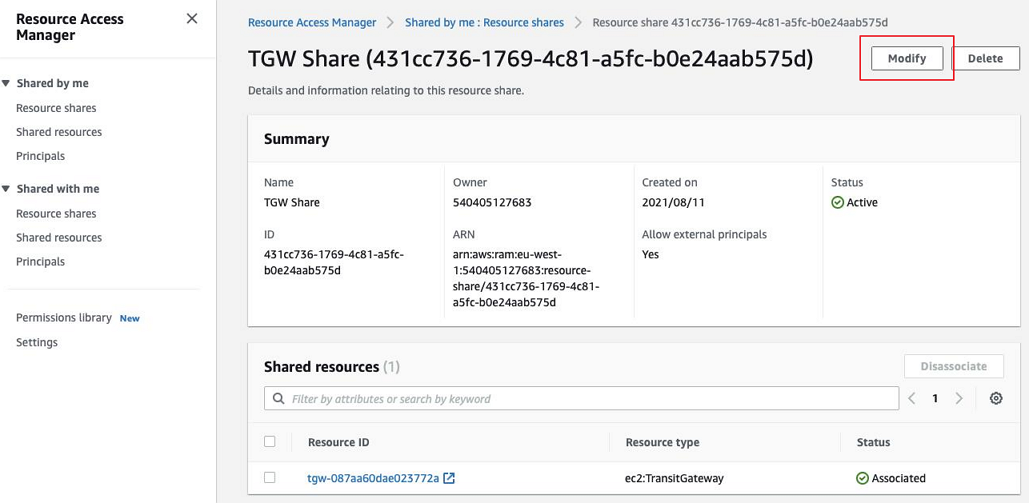
Click Modify.
-
Click Next.
-
Add the AWS account ID of the shared account and click Next.

-
Update the resource share.
-
-
Create the CloudFormation stack.
-
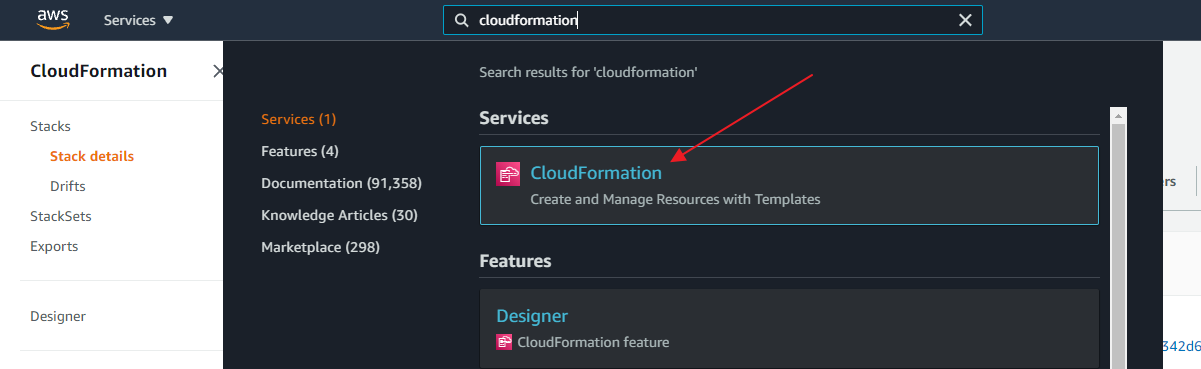
Click Management Tools>CloudFormation.
-
As an admin, open the AWS account that will contain the shared VPC.
-
Click the Create Stack button.
-
In the Select Template page, select the Specify an Amazon S3 template URL option and enter the 3_Shared_VPC.yaml template's URL. The template URLs are provided in CloudShell Download Center for each CloudShell release version.
-
Click Next.
-
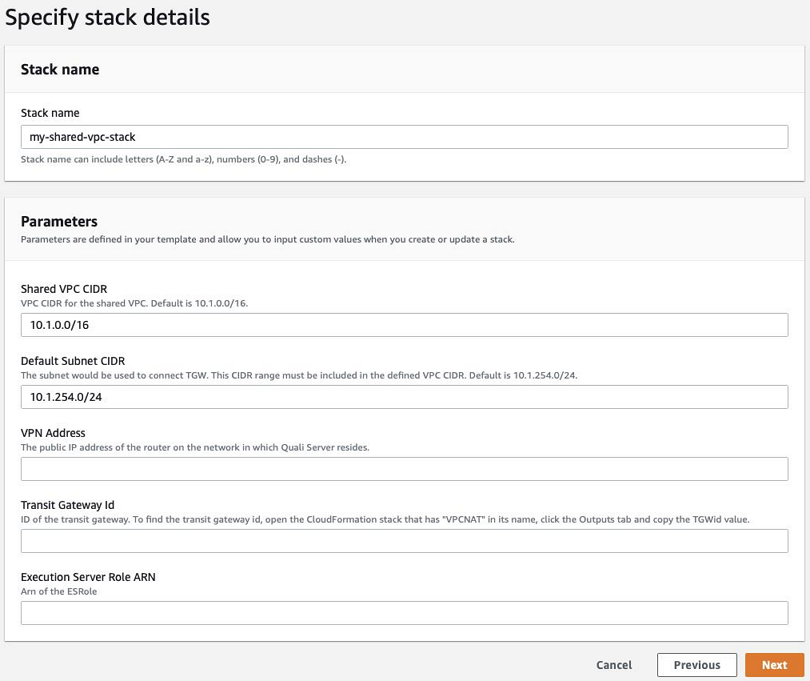
In the Specify Details page, enter a Stack name and fill in the installation parameters.
Parameter Description Shared VPC CIDR VPC CIDR for the shared VPC. Default is 10.1.0.0/16.
Important:We strongly recommend to use a "/16" CIDR range. A smaller range will force you to specify subnet ranges for every new sandbox and may dramatically decrease the number of sandboxes you can have running at the same time.
Default Subnet CIDR Default CIDR to be used by CloudShell. This CIDR range must be included in the defined VPC CIDR. Default is 10.1.254.0/24.
noteCloudShell cannot differentiate between this CIDR and the VPC CIDR, which can cause overlap. To avoid this from happening, we recommend specifying a limited default subnet CIDR. For example, "10.1.254.0/24” or "10.1.253.0/24”.
VPN Address The public IP address of the router on the network in which Quali Server resides. Transit Gateway ID Created by the deployment of the management VPC. To find the transit gateway ID, open the main CloudFormation stack , click the Outputs tab and copy the TGWid value. Execution Server Role ARN Created by the deployment of the management VPC. To find the role ARN, open the main CloudFormation stack , click the Outputs tab and copy the ESRoleArn value. For example:
-
Click Next.
-
In the Options page, click Next.
-
In the Review page, at the bottom, select the I acknowledge that AWS CloudFormation might create IAM resources check box.
-
Click Create.
The stack is created.
-
-
Modify the Execution Server role ARN.
-
As an admin, open your AWS management account.
-
In the CloudFormation dashboard, click the main stack (bearing the stack name followed by "-VPCNAT. For example, my-stack-VPCNAT-2JDLSJ32D4LC).
-
Click the Resources tab and click the ESRole's physical ID.
-
Click CloudShell_EC2Access.
-
Click Edit Policy.
-
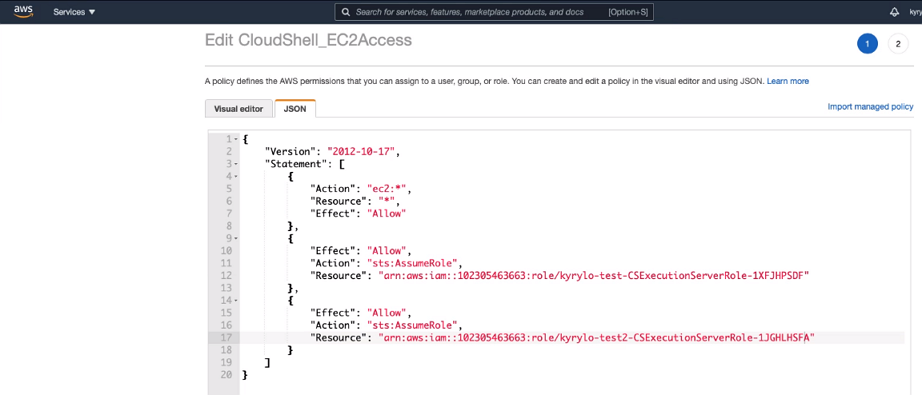
Switch to the JSON tab and add the following statement for each shared VPC you deployed:
{
            "Effect": "Allow",
            "Action": "sts:AssumeRole",
            "Resource": "<shared role arn>"
        },
For example: JSON defining two shared VPCs:
-
Replace "<shared role arn>" with the shared role ARN. To find the shared VPC role ARN, open your AWS account in a new browser tab, open the shared VPC CloudFormation stack , click the Outputs tab and copy the SharedVpcRoleArn value.
-
Click Review policy and then Save changes.
-
-
Next, do one of the following:
- If Quali Server is installed in your on-prem network: Connect the Management VPC to Quali Server.
- If Quali Server is also on AWS: Configure an Execution Server Selector for AWS EC2.