Create VM using the qcow2 Image File (KVM)
Use the following steps to create a VM on your Centos 7 machine.
Note: Your CPU must have hardware virtualization support (Intel VT-x or AMD-V) to be able to use KVM.
To create a VM by deploying the OVF template:
- Login to your machine as root user.
- Navigate to the directory where the installation files were downloaded. Create a backup copy of the qcow2 image file.
- Move the qcow2 image file to the directory where you want to place the VM.
In the Linux desktop, open Virt-manager
 and click Create a new virtual machine
  .
.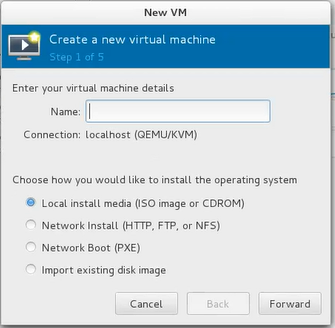
- In the New VM window, in the Name field, enter a name for the VM.
Select Import existing disk image and click Forward.

Click Browse and navigate to the path of the qcow2 image file. Select the image file and click Open. Click Forward.
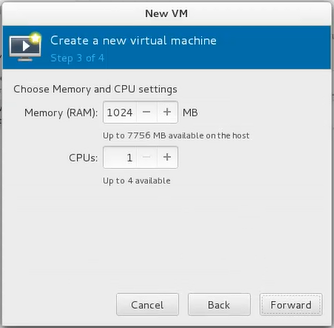
For memory and CPU settings, specify values that match your system. For the purposes of this procedure, the values 4 GB RAM (4096 MB) and 4 CPUs are used. Click Forward.
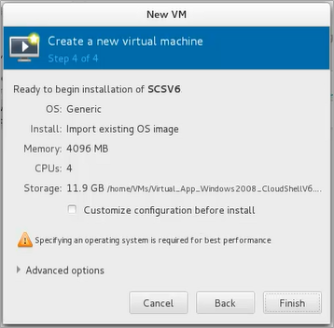
Select Customize configuration before install. Click Finish.
The details of the VM to be created are displayed.
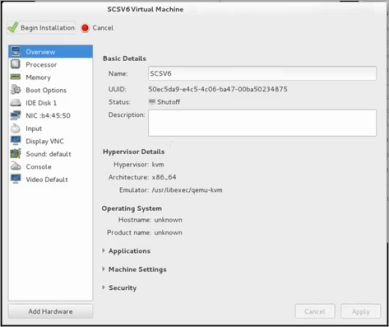
From the left pane, select IDE Disk 1. Click Advanced options.
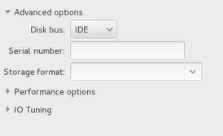
- Ensure that IDE is selected in the Disk bus field.
- In the Storage format field, select qcow2. Click Apply.
Click
 .
.The VM is created.