Configure Azure API to work with CloudShell
CloudShell Apps communicate with Azure using the Azure API. To enable the two platforms to work with each other, you need to add a web application that has permission to use the Azure API.
- You will need an Azure Global Administrator, Application Administrator or Cloud Application Administrator role to perform this procedure.
- During the app registration process, you will need to save the subscription ID, client ID, tenant ID, and client secret key for later use in your CloudShell "cloud provider resource".
This configuration is a three-step process:
Add an Azure web application
To add an Azure web application:
- Log in to https://portal.azure.com.
-
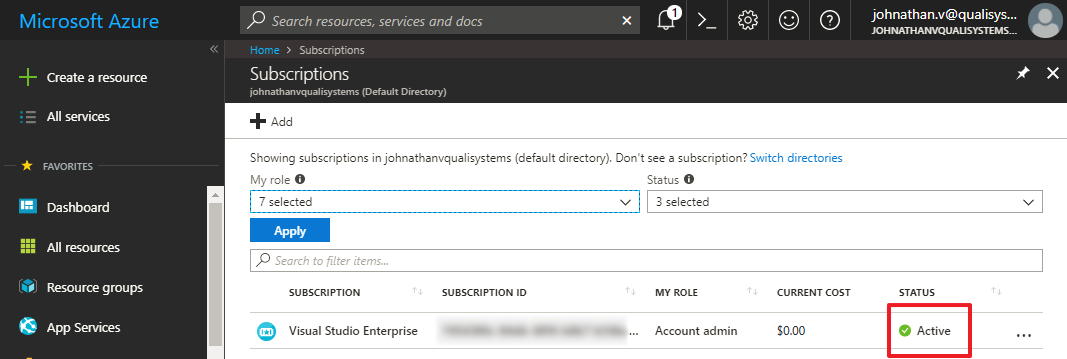
Open the Subscriptions page and make sure you have an active subscription.
-
Make sure your subscription has the appropriate permissions.
-
From the user menu, click the More links button and select My permissions.
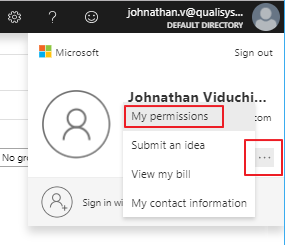
- In the My permissions blade, click Resource Provider Status.
-
In the Resource Provider Status blade, make sure the following permissions are registered (register any missing ones):
- Microsoft.Compute
- microsoft.support
- Microsoft.Resources
- Microsoft.Features
- Microsoft.Network
- Microsoft.Authorization
- Microsoft.Storage
- Microsoft.OperationalInsights
-
-
Return to the Subscriptions page and copy and store the Subscription ID somewhere you'll remember.
- From the left pane, select Azure Active Directory.
- In the active directory's blade, click App registrations.
- In the App registrations blade, click the New registration button.
-
Enter the new web application's settings:
Parameter Description Name Name of the web application. For example, "CloudShell App". Supported account types Select Accounts in this organizational directory only (Default Directory). Redirect URL Select Web and enter a URL. For example, "https://quali.com". This is required for creating the web application but does not affect it. -
Click Register at the bottom of the blade.
The new web application is displayed.

-
Copy and store the Application (client) ID and Directory (tenant) ID. You will need these values when creating the cloud provider resource in CloudShell.
- Proceed to the next section to delegate Azure API permissions to the web application.
Delegate Azure API permissions to the web application
To delegate Azure API permissions to the web application:
- Return to the App registrations blade of the subscription's active directory, as explained in the previous section.
- Click the web application you created in the previous section. If you don't see the web application, select All applications.
-
In the web application's page, click API permissions and do the following:
-
Delegate Azure Service Management permission: Click Add a permission. In the Request API permissions blade, in the Microsoft APIs tab, click the Azure Service Management tile, make sure the Delegated permissions tile is selected and select the Access Azure Service Management as organization users (preview) checkbox. Click Add permissions at the bottom of the blade.
The API permissions blade should look like this:
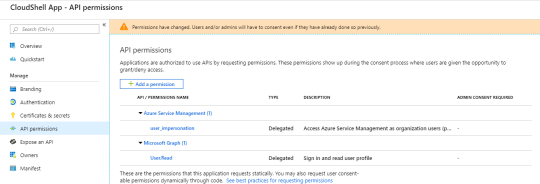
- Delegate Sign in and read user profile permission: Click Add a permission. In the Request API permissions blade, in the Microsoft APIs tab, scroll down and click the Azure Active Directory Graph tile. Select Delegated permissions, expand User and select User.Read (Sign in and read user profile). Click Add permissions at the bottom of the blade.
-
Click the Grant admin consent for Default Directory button at the bottom.
-
- Next, create a client secret (Azure application) key to be used by the CloudShell App for authentication with Azure.
- In the web application's page, click Certificates & secrets.
- Click New client secret and set it to expire In 2 years.
Click Add.
The client secret key is displayed.
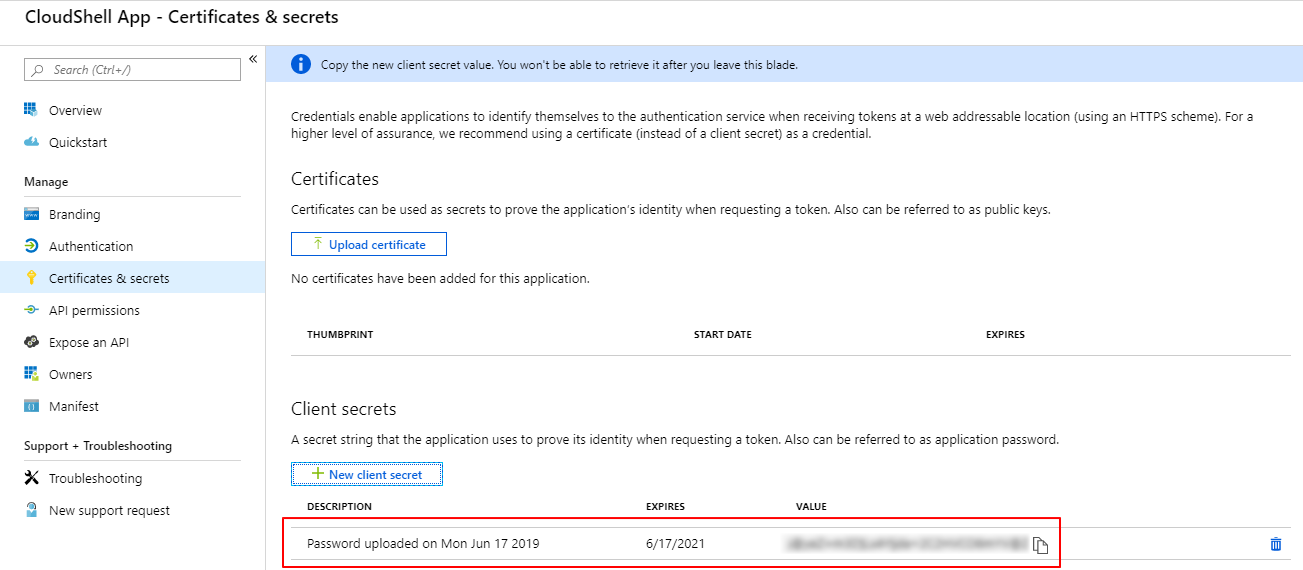
Copy and store the key value somewhere you'll remember. This is the Azure Application Key you will need to specify in the Azure cloud provider resource in CloudShell.
Note: The client secret key is displayed only once and will disappear when you leave this blade.
- Proceed to the next section to configure the web application as Contributor.
Configure the web application as Contributor
The Contributor role enables CloudShell to create and manage virtual machines and other Azure services.
To configure the Azure web application as Contributor:
-
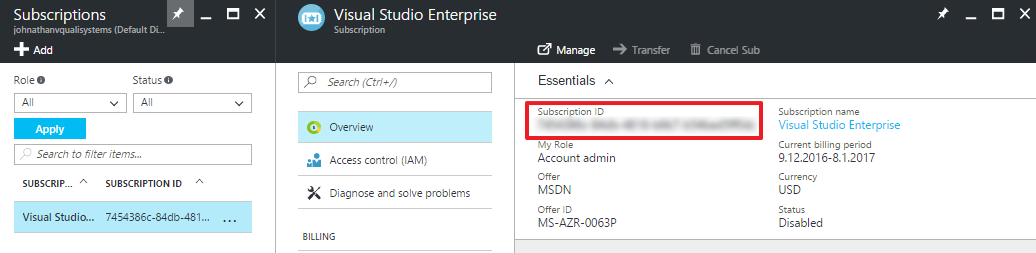
From the left pane, select Subscriptions and click the required subscription.
For example, Visual Studio Enterprise:

-
In the blade that appears, click Access control (IAM).
The Access Control blade is displayed.
Note: If you don't see this blade, clear your browser's cache and refresh the page.
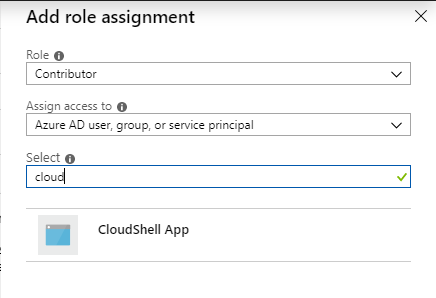
- Click Add and select Add Role assignment.
- In the Add role assignment blade, from the Select a role dropdown list, select the Contributor role.
-
In the Select field, search for the web application you created.
For example:
-
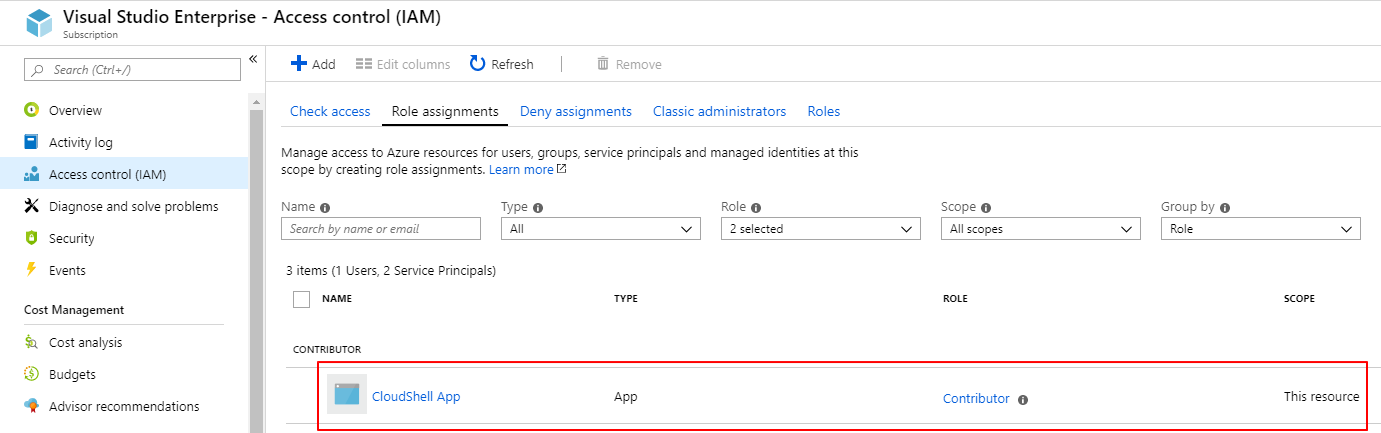
Select the app and click Save at the bottom of the blade.
To verify that the web application was created correctly, in the Access control (IAM) blade, click the Role assignments tab and make sure it is displayed as a Contributor.
- Next, Create a Management Resource Group and VNets.