Quickstart Guide - Creating and Reserving Blueprints
In this guide, we’ll focus on creating blueprints that model physical devices for L1 network/hardware testing purposes.
Target audience: Blueprint designers
Basic flow
Using CloudShell, setting up the test environment is simple:
- Create a blueprint.
- Add resources and model L1 connections.
- Define the blueprint's properties.
Create a blueprint
A blueprint is an offline container of the environment you would like to spin up. It contains the environment’s components and network connections, as well as any required automation scripts. The use of blueprints allows you to repeatedly launch the same pristine environment.
To create a blueprint:
-
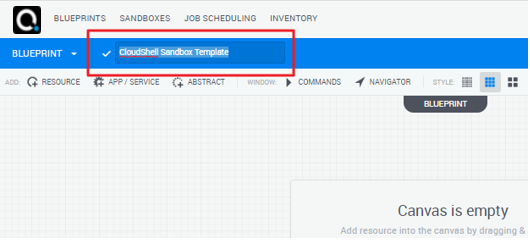
In the Blueprint Catalog, click the Create Blueprint link in the top left corner.
-
In the blueprint’s workspace, specify a name for the blueprint and click the check mark when you’re done.
-
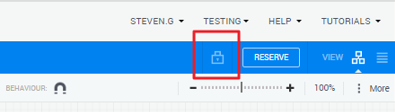
If you want other members of your domain to also see and use this blueprint, click the Lock button in the blue banner to unlock privacy.
-
Next, let’s add resources and their network connections.
Add resources to the blueprint
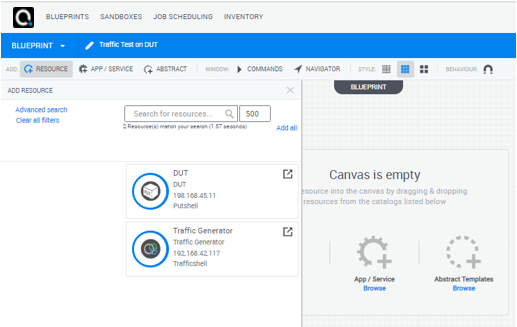
Resources are our way of calling your devices in CloudShell. Each resource models a specific device in your lab, like a router, switch, DUT or bridge, and allows you to control that device or perform operations on it, from within CloudShell.
Don’t worry, the CloudShell admin already set those up for you. All you need to do is drag the ones you need into your blueprint and set up their network connections.
To add resources to the blueprint.
-
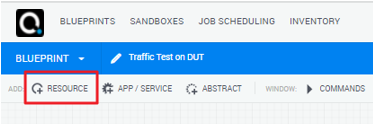
In the blueprint workspace, click Resources.
-
From the Add Resource catalog, drag the resources you need into the canvas.
Our catalog has two resources, DUT and Traffic Generator, but you can use the free text search field or Advanced search to fine tune your search if you have a lot of resources.
Each new blueprint includes CloudShell's out-of-the-box orchestration scripts that set up and tear down the environment. The Setup script provisions the resources to the sandbox, resolves reservation conflicts, deploys App VMs and establishes connections between the sandbox's endpoints. The Teardown script is activated when the sandbox starts its teardown process and is responsible for releasing the resources, removing connections and deletes App VMs and related infrastructure from their cloud provider.
Set up connectivity
CloudShell also allows you to model the actual network connections between the blueprint’s devices. When you reserve the blueprint, CloudShell will create the connections for you.
To set up connectivity between 2 resources:
-
Hover over a resource and select the Create Connection option.
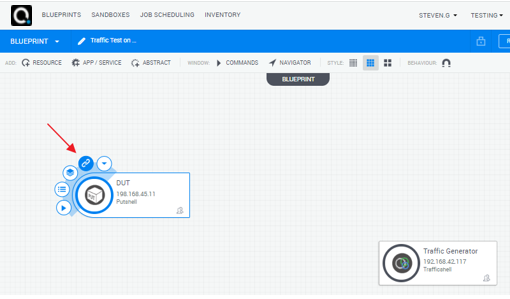
-
Then, click the other resource.
-
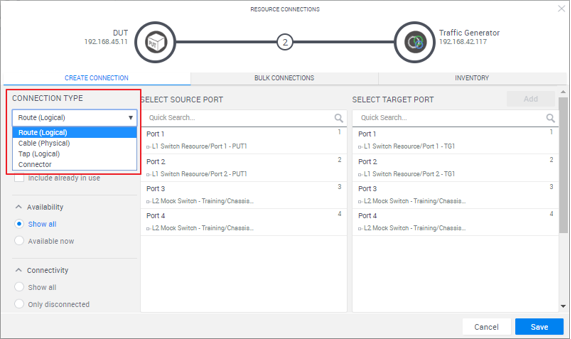
In the Resource Connections dialog box, from the Connection Type dropdown list, select Route (Logical) to create a L1 connection or Connector for a L2 connection.
-
Select a port on the source resource and one on the target and click Add. Repeat this step to add additional connection routes.
-
Click Save.
Physical routes are represented by black dotted lines between the resources, as illustrated in the image below.
Notes- If a connection route is purple, that’s because you defined a Connector type of a connection. This is used for L2 connections and will fail unless you have an L2 resource or vCenter dvSwitch connecting the endpoints. Edit the route connection to open the Resource Connections dialog box, click the Inventory tab in the dialog box, delete the connections and create new ones.
- If you defined an L1 connection in the blueprint but the connection line is orange, that’s because there’s no L1 switch resource connecting the endpoints. Notify the administrator.
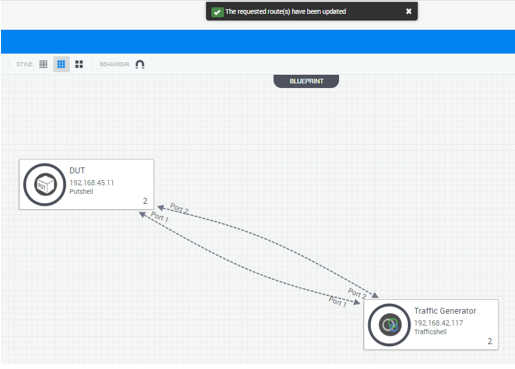
At this point, they’re just connection requirements. When the sandbox starts, CloudShell will activate the connections, replacing the dotted lines with solid ones.
-
The blueprint is now ready for use. Next, let’s learn how to reserve a blueprint so we can run our test.
Define the blueprint's properties
Orchestration scripts
CloudShell provides out-of-the-box setup and teardown orchestration scripts which are attached to every new blueprint, but you’re welcome to create your own custom scripts, as explained in Creating and using orchestration scripts in CloudShell.
The out-of-the-box scripts do the following:
- CloudShell Sandbox Setup: Make sure sandbox resource are available (conflict resolution), reserve resources, deploy Apps on their defined cloud providers and establish connections
- CloudShell Sandbox Teardown: Release resources, tear down Apps (delete deployed VMs and related infrastructure from the cloud provider) and remove connections.
- Save/Restore: Used to save the memory, state and configurations of sandboxes and later on restore them back