Installing Windows Network Load Balancing
To install Windows Network Load Balancing:
-
Click Start > Administrative Tools > Server Manager.
-
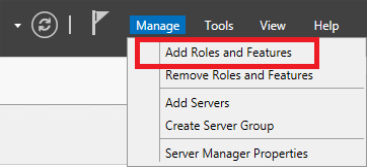
Click Manage and then select Add Roles and Features.

-
Click Next.
-
In the Add Roles and Features Wizard, select Installation Type.

-
Select Role-based or feature-based installation and click Next.

-
Select a server for the installation and click Next.

-
In the Select features menu, select Features.

-
In the Features selection pane, select the Network Load Balancing option.

-
In the Add features that are required for Network Load Balancing dialog box, click Add Features.
-
In the Features selection pane, click Next.

-
In the Confirm installation selections window, select the Restart the destination server automatically if required option.

-
Click Install.
-
Repeat steps 1-13 in each of the ARR servers (this can be done in parallel).