Setting up Training Portal Using Docker (Over the Shoulder)
Prerequisites
- Docker installed and running
- NodeJS 14
- Internet connection
- CloudShell 2020.1 GA or higher
- QualiX 3.2 or higher
Installation
To install the Training Portal:
-
On the docker machine, run the following from the
/opt/directory:sudo docker run -d -p <TrainingPortalPort>:3001 -e QS_SANDBOX_API="http://<SandboxAPI>:<SandboxAPIPort>" --name CloudShell-Training-Portal qualihub/training-portal:<ImageTag>Where:
- <TrainingPortalPort> is the Training Portal's port (Docker machine hostname/IP address is not required)
- <SandboxAPI> is the sandbox API hostname or IP address
- <SandboxAPIPort> is the Sandbox API's port
- The latest <ImageTag> can be found in CloudShell Download Center
Make sure you specify the
<TrainingPortalPort>,<SandboxAPIAddress>and<SandboxAPIPort>For example:
sudo docker run -d -p 5027:3001 -e QS_SANDBOX_API="http://192.168.85.24:82" --name CloudShell-Training-Portal qualihub/training-portal:0.1.0.6 -
If prompted, provide the admin password and press [Enter].
The container id is displayed. For example:

-
To verify the installation, run:
sudo docker logs CloudShell-Training-Portal
At this point, you should be able to access the Training Portal at <Docker-Machine>:<TrainingPortalPort> (For example: 192.168.85.28:5027).
Configuration
In the this procedure, you will set up the over the shoulder links.
An "over the shoulder" connection requires an existing "full access" session to the device (VM or physical). In other words, if the "full access" user does not have an active remote connection session to the device, the "over the shoulder" connection will fail.
To configure Training Portal links:
-
In the Quali Server machine, open the following file in a text editor:
C:\ProgramData\QualiSystems\Settings\Global\ServerUniversalSettings.xml. -
Do the following under the
<ConfigurationSection name="LinkApplications">tag:-
Copy the appropriate Full link(s):
importantMake sure to use these links and not the ones in Configure Remote Access to Sandbox Components Using SSH, RDP, Telnet, VNC (QualiX).
SSH Full link:
<key name="SSH - Full" pattern="http://<QualiX IP>/remote/#/client/c/ssh{qid}?qtoken={qtoken}&hostname={Address}&protocol=ssh&port=22&username={User}&password={Password}" icon-key="SSH" />RDP Full link:
<key name="RDP - Full" pattern="http://<QualiX IP>/remote/#/client/c/rdp{qid}?qtoken={qtoken}&hostname={Address}&protocol=rdp&port=3389&username={User}&password={Password}&security=any&ignore-cert=true" icon-key="RDP" /> -
Copy the appropriate Read only or Full access link from the sections below:
Read only links:
In "read only" mode, the user can only view the session but not move elements or click buttons and links on the connected device.
<key name="SSH - Readonly" pattern="http://<Qualix IP>/remote/#/client/c/ssh{qid}sharedr?qtoken={qtoken}&hostname={Address}&protocol=ssh&port=22&username={User}&password={Password}&shared=true&readonly=true" icon-key="SSH" /><key name="RDP - Readonly" pattern="http://<Qualix IP>/remote/#/client/c/rdp{qid}sharedr?qtoken={qtoken}&hostname={Address}&protocol=rdp&port=3389&username={User}&password={Password}&security=any&ignore-cert=true&shared=true&readonly=true" icon-key="RDP" />Read/Write access links:
A full access connection grants the user full permissions on the device or VM's OS. However, since this is a shared link, it can only access existing connections but not create them.
<key name="SSH - Read&Write" pattern="http://<Qualix IP>/remote/#/client/c/ssh{qid}sharedr?qtoken={qtoken}&hostname={Address}&protocol=ssh&port=22&username={User}&password={Password}&shared=true&readonly=false" icon-key="SSH" /><key name="RDP - Read&Write" pattern="http://<Qualix IP>/remote/#/client/c/rdp{qid}shared?qtoken={qtoken}&hostname={Address}&protocol=rdp&port=3389&username={User}&password={Password}&security=any&ignore-cert=true&shared=true&readonly=false" icon-key="RDP"/> -
In each link, replace
<QualiX IP>with the QualiX Server hostname or IP address.
-
-
Save the file.
-
Restart the Quali Server service.
-
In Resource Manager Client, create a user for the trainee with access to the appropriate domain.
Setting up a new training session
-
In REST API, create an access token for the training session:
-
Open the Training Portal's live documentation page:
http://\[CloudShellPortalAddress\]:82/api/explore/#/ -
Log in to the user's domain.
-
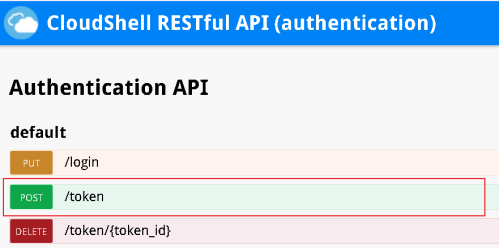
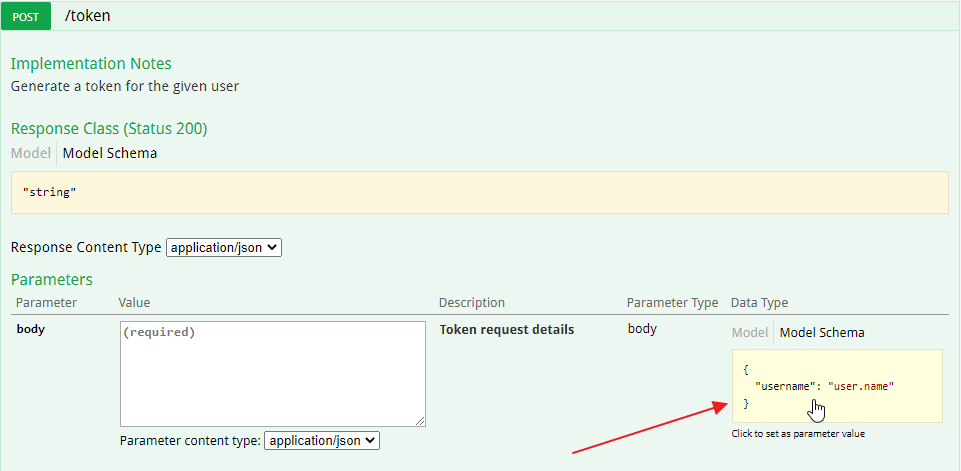
Expand the POST /token API method.
-
Click inside the Model Schema area to load the request body.
-
In the body area, replace user.name with the trainee's CloudShell user name (do not remove the quotes).
For example:
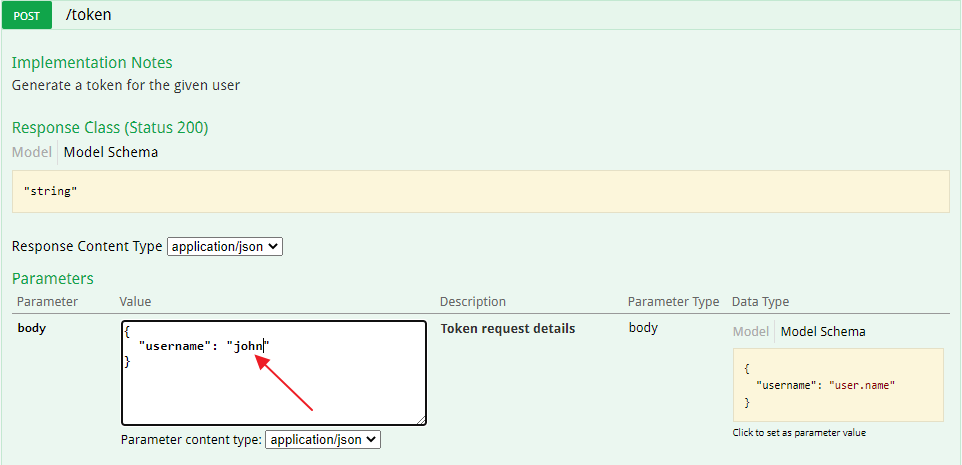
-
Click Try it out!.
A Response Code of "200" indicates success.
-
Copy the access token from the Response Body, without the quotes.
-
-
Build the training portal link:
http://<TrainingPortaUrl>:<TrainingPortalPort>/<SandboxId>?access=<AccessToken>Where:
- <TrainingPortalUrl> is the Training Portal's URL
- <TrainingPortalPort> is the Training Portal's port
- <SandboxId> is the sandbox ID (taken from the sandbox's URL)
- <AccessToken> is the access token you copied from the POST /token API's Response Body
For example:
http://192.168.85.28:5027/645b57f6-9ea3-4968-aa92-900bf3ee5be8?access=NEapY8Cnqk6JYPNAt7il5w2The trainee uses this link to work in the sandbox.
Over-the-shoulder users access the trainee's QualiX session from the sandbox, via the resource or App's remote access links.