Customizing Shells
In this section, we’ll learn how to create and modify a shell’s commands and attributes.
This article addresses two flows:
-
Modifying an existing shell
-
Creating a new shell with modifications to the standard
At the end of this article, you can find an end-to-end example of how to extend an existing shell with attributes and commands.
Modifying an existing shell is done using the shellfoundry extend command. This command downloads the source code of the shell you wish to modify to your local machine and updates the shell’s Author. Note that extending official shells (shells that were released by Quali) will remove their official tag. Keep in mind that modifying a shell that is being used in CloudShell may affect any inventory resources that are based on a previous version of the shell. In the second flow, since we’re creating a new shell from the appropriate shell standard, we will use the shellfoundry new command and modify the shell’s settings.
The common use cases for customizing a shell are:
-
Adding new commands
-
Modifying existing commands
-
Adding new attributes
-
Modifying existing attributes
-
Publishing attributes in a service shell
-
Associating categories to a service shell
Please watch this video if you’re not sure whether to create a new shell or customize an existing one:
Customizing a shell’s commands
When customizing an official shell you can add new commands, and also modify or hide existing ones.
To add a new command:
- Add the command in the shell’s
driver.pyfile, and expose the command in the shell’sdrivermetadata.xmlfile.
The command’s logic should be placed either in the driver itself or in a separate Python package.
Modifications to a command can include adding some logic either before or after the command or changing the command logic itself. In order to do that, copy the command code from the original Quali Python package to the shell driver or to the custom Python package you created (the command logic resides either in the vendor package or vendor-os package - for example in "cloudshell-cisco” or "cloudshell-cisco-ios”).
When modifying an existing command, you can add optional input parameters. Just make sure that the implementation is backwards compatible. Note that adding mandatory inputs or removing one of the original inputs is not supported. In these cases, it is recommended to create an additional command with a different name, instead of modifying an existing one.
For example, in this customized Cisco NXOS shell, we modified the commands that configure VLANs on multiple ports and port channels.
It is also possible to hide or remove a command. Hiding a command is done by placing it in a hidden or "admin” category in the drivermetadata.xml - see Commands Visibility and Usability. Note that removing a command might affect how the shell is used since CloudShell and/or some orchestration scripts might depend on the existing driver’s commands.
When adding or modifying a command, you can leverage Quali’s shell framework to ease the development process. For details, see Quali’s Shell Framework (Python 2) and Quali’s Shell Framework (Python 3).
See some common command extension examples in Common Driver Recipes.
Please check out the following instructional videos on how to develop basic driver commands:
Customizing a shell’s attributes
You can add and modify attributes associated with the shell’s root model or with a specific sub-model within the shell.
Modification applies to attributes that are defined in the shell’s standard. To find the attributes defined in the shell’s standard, see the documentation page of your shell’s standard. For such attributes, you can modify the description, default values, possible values and rules.
You cannot modify an attribute's type and name, nor any attributes that are associated with the shell’s family as this will affect other shells that use this family.
Deployment-specific vs. shell-specific attributes
CloudShell provides two ways to customize attributes, which differ depending on the attribute’s usage:
-
Customizing an existing shell: Use this option when the attributes are related to a specific device but are not relevant to other shells. This is done by manually editing the shell’s shell-definition.yaml file.
-
Associating custom attributes with a shell that is installed in CloudShell: Use this option when the additional attributes are deployment-related and relevant to multiple resources of different shells. For example, the Execution Server Selector attribute. Starting with CloudShell version 8.3, this option applies both to the root model of the shell and to the shell’s sub-resource models, such as blades and ports.
The second option of associating custom attributes with an already installed shell is done either via CloudShell Portal or by calling the SetCustomShellAttribute API method. For additional information on this method, see Deploying to Production.
Deleting a 2nd Gen shell’s default attributes (those that come with the standard) is not supported. It is also not possible to customize a 2nd Gen shell’s data model (families and models) and its structure, which is as defined in the shell standard the original shell is based on.
Adding or modifying attributes in a shell’s root or sub-model
This section explains how to add attributes to the shell’s root model and to specific models within the shell. To learn how to expose attributes that are required for the discovery of the resource (in the Inventory dashboard’s Resource discovery dialog box), see Auto-discovery for Inventory Shells.
To add/modify a shell’s attributes:
-
Open command-line.
-
To customize a shell that resides on your local machine, make sure command-line is pointing to a different path from the original shell’s root folder.
-
Run the appropriate command in command-line:
To modify a shell:
shellfoundry extend <URL/path-to-shell>The path can be a URL to the source code of the shell’s desired release in Quali Repositories or the filesystem path (prefixed by local:) to the extracted source code folder (like "local:C:\temp\Cisco-NXOS-Switch-Shell-2G-2.0.1”).
To create a new shell based on a specific shell standard:
shellfoundry new <Shell-name> --template <template> -
In the shell’s download folder, open the
shell-definition.yamlfile in your preferred editor. -
Update the
template version. -
Locate "
node-types:". -
Under the root level model, add the following lines:
properties:
  my_property:
    type: string
    default: fast
    description: Some attribute description
    constraints:
      - valid_values: [fast, slow]
tags: [configuration, setting, search_filter, abstract_filter, include_in_insight, readonly_to_users, display_in_diagram, connection_attribute, read_only] -
Edit the values, as appropriate.
-
properties: Header for the shell’s attributes. Needs to be added only once.
-
property_name: (Relevant when adding an attribute) Replace my_property with the new attribute’s display name if you want to add a root level attribute. Attribute name must begin with a letter and can contain alpha numeric characters, spaces and underscores.
To add an attribute to a sub-model, replace my_property with the sub-model name (remove any spaces from the name), followed by the name of the new attribute. For example: "Chassis.My new attribute:”. For the sub-models of a specific shell, see the documentation page of your shell’s standard. Do not remove the colon (:) from the end of the line.
-
type: (Relevant when adding an attribute) Type of attribute. Optional values: string, integer, float, boolean, cloudshell.datatypes.Password.
-
default: The default value of the attribute. If you don’t specify a default value, CloudShell will use the default value according to the data type: empty string for string attributes, ‘0’ for integers, and false for boolean attributes. Wrap the value in single quotes if it contains one of the following characters: :, {, }, [, ], ,, &, *, #, ?, |, -, < >, =, !, %, @, `, and use double quotes if your value contains a backslash "\” to avoid escaping it.
-
description: Attribute’s description.
-
constraints: Permitted values.
-
tags: Attribute rules. For details, see Modeling Shells with TOSCA. Note that for service shells, the only applicable rule is user_input. For details, see Publishing a service shell’s attributes.
-
-
Remove any unneeded lines.
-
Save the file.
-
In command-line, navigate to the shell’s root folder.
-
Package the shell.
shellfoundry pack -
Import the shell into CloudShell.
If a previous version of the shell already exists in CloudShell, upgrade the existing shell with the new one in CloudShell Portal’s Shells management page. This capability is available for 2nd Gen shells.
Customizing a service shell
Customizing a service shell’s commands is the same as for resource shells, while customizing attributes largely follows the same procedure. The only difference is in how you publish a service’s attribute and associate a service shell to service categories.
Publishing a service shell’s attributes
Publishing an attribute displays that attribute in the service’s settings dialog box when a CloudShell user adds or edits a service in a blueprint or sandbox diagram. This is done by adding the user_input tag to the attribute.
Note that starting with CloudShell 9.1 GA, when adding a custom attribute to an already installed service shell (via CloudShell Portal’s Shells management page or the API), the attribute is defined as "user input” by default.
To publish a service shell’s attribute:
-
Add or modify an existing attribute as explained in the Customizing a shell’s attributes section above.
-
If you want the service’s attribute to be exposed in the blueprint and sandbox, replace the tags line with the following:
tags: [user_input] -
Save the
shell-definition.yamlfile, package and import the shell into CloudShell.
Associating categories to a service shell
This procedure explains how to add service categories to a 2nd Gen service Shell. In CloudShell Portal, service categories appear in the services catalog and are used to expose services in specific domains in CloudShell. This is done by associating a service category that is linked to specific domains to a service shell.
To associate service categories to a service shell:
-
Open command-line.
-
To customize a shell that resides on your local machine, make sure command-line is pointing to a different path from the original shell template’s root folder.
-
Run the appropriate command in command-line:
To modify a shell:
shellfoundry extend <URL/path-to-shell-template>The path can be a URL to the source code of the shell’s desired release in Quali Repositories or the filesystem path (prefixed by local:) to the extracted source code folder (like "local:C:\temp\Cisco-NXOS-Switch-Shell-2G-2.0.1”).
To create a new shell based on a specific shell standard:
shellfoundry new <Shell-name> --template <template> -
In the shell’s download folder, open the
shell-definition.yamlfile in your preferred editor. -
Update the template version.
-
Under
node-types:, locateproperties:, and add the following lines underneath:Service Categories:
type: list
default: [My Category 1, My Category 2]Notes:- The
properties:line needs to be added only once, so do not add it if it already exists uncommented in theshell-definition.yaml. - It is recommended to use up to a 2-level hierarchy when organizing the Add App / Service catalog (i.e. root and sub-category).
- In the Add App / Service side pane, services are displayed in the root category only. This includes services associated to sub-categories.
- The
-
Specify the categories in the
default:line (comma-separated list). -
Package and import the shell into CloudShell.
The shell’s categories are added to the Global domain. If a category with the same name exists in another domain, CloudShell will also link this category to the Global domain.
-
To make the service available in other domains, in CloudShell Portal’s Categories management page, add those domains to the service’s categories.
Example: Extending a shell with attributes and commands
To help us understand the shell customization process, let’s add attributes and commands to a shell. To simulate this process, we’ve created a modified version of the Cisco IOS Router Shell, which creates a mock resource structure of 16 ports. Please feel free to use it.
Start by extending the shell. From the CiscoIOSRouter2GWithAutoload shell’s GitHub Releases page, copy the source code link address of the latest release. Then, run shellfoundry extend.
For example:
shellfoundry extend https://github.com/QualiSystemsLab/CiscoIOSRouter2GWithAutoload/archive/1.0.zip
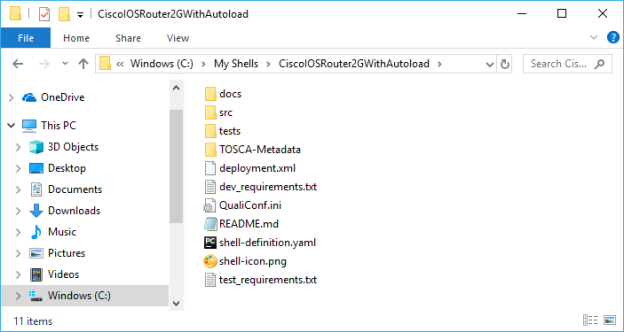
The shell project is created in the directory from which you ran the command.
When you extend a shell, it’s recommended to change the shell’s version and author. This is done in the shell project’s shell-definition.yaml file.
For example:
metadata:
  template_name: Cisco IOS Router Shell 2G
  template_author: steven
  template_version: 1.0.1
To see how it looks in CloudShell Portal, navigate to the shell’s root folder in command-line and install the shell.
For example:
cd "c:\My Shells\CiscoIOSRouter2GWithAutoload"
shellfoundry install
In the Shells page, we can see the shell’s updated author and version.

You can also change the image. To do so, add the image file to the shell project’s root folder and in the artifacts section of the shell-definition.yaml, set the file name.
artifacts:
  icon:
    file: shell-icon.png
    type: tosca.artifacts.File
  driver:
    file: CustomDataModelDriver.zip
    type: tosca.artifacts.File
And set it in the metadata section.
metadata:
  template_name: CustomDataModel
  template_author: steven
  template_version: 0.1.1
  template_icon: shell-icon.png
To see the image, install the updated shell.
shellfoundry install
And in the Inventory dashboard, create a resource based on the shell (if you’re using our modified shell, you don’t need to specify the credentials of a real Cisco IOS router) and add the resource to a blueprint.
The image should be displayed on the resource.

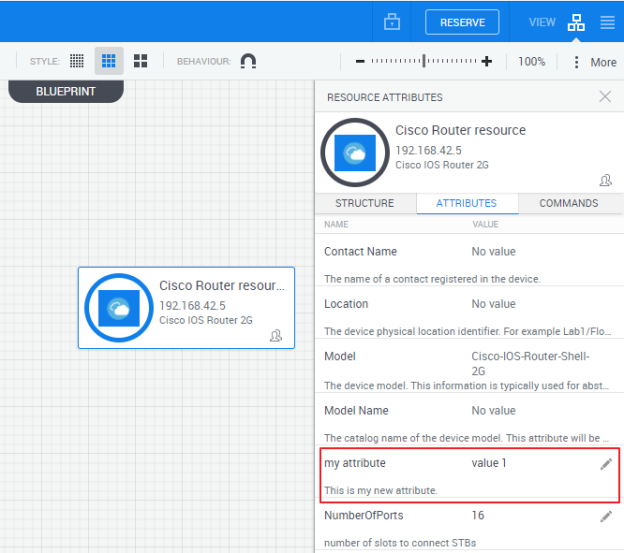
Next, create an attribute on the root model of the resource. Attributes are created in the properties section of the shell-definition.yaml. We’ll add a string attribute called "my attribute” with a default value and some rules.
node_types:

  vendor.Cisco IOS Router 2G:
    derived_from: cloudshell.nodes.Router
    properties:
      my attribute:
        type: string
        default: value 1
        description: This is my new attribute.
        constraints:
          - valid_values: [value 1, value 2, value 3]
        tags: [setting, configuration]
The attribute is added to resources created from this shell. To see the attribute on our resource, install the shell on CloudShell, return to the blueprint and open the resource’s Resource Attributes pane.
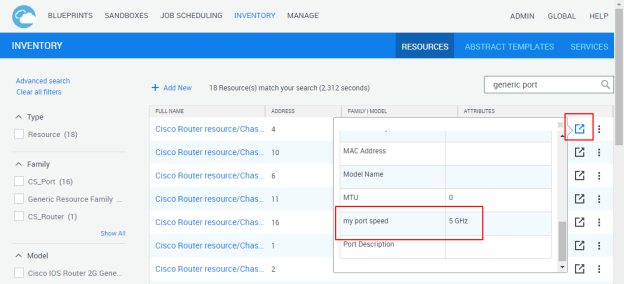
Let’s say you want to create an attribute on the shell’s port. Starting with CloudShell 8.3, this capability is supported. Sub-model attributes are added the same way as root model attributes. The only difference is that for sub-model attributes, you need to include the sub-model before the property name (in our case, the sub-model is "Generic Port”). If the sub-model consists of several words, remove any spaces between them.
For example, adding an attribute called "my port speed” to the Generic Port sub-model:
node_types:

  vendor.Cisco IOS Router 2G:
    derived_from: cloudshell.nodes.Router
    properties:
      GenericPort.my port speed:
        type: string
        default: 5 GHz
        description:
        constraints:
          - valid_values: [5 GHz, 10 GHz, 15 GHz]
        tags: [setting, configuration]
      my attribute:
        type: string
        default: value 1
        description: This is my new attribute.
        constraints:
          - valid_values: [value 1, value 2, value 3]
        tags: [setting, configuration]
To see the new attribute, in the Inventory dashboard, find the resource’s ports (you can use the search field), click a port’s "more info” button and in the window that pops up, scroll down until you see the attribute.
You can also add attributes that are required for the resource’s discovery. While non-discovery attributes only need to be added to the properties section, new discovery attributes are added both to the properties section of the shell-definition.yaml, and to the capabilities section’s properties. We’ll add an attribute called "my discovery attribute”.
capabilities:
  concurrent_execution:
    type: cloudshell.capabilities.SupportConcurrentCommands
  auto_discovery_capability:
    type: cloudshell.capabilities.AutoDiscovery
    properties:
      my discovery attribute:
        type: boolean
        default: true
Let’s make sure the attribute was added to the shell. In the Inventory dashboard, select Discover from the resource’s more options menu. The attribute should be listed on the resource.

Note that if we’re adding a discovery attribute that is already included in the shell’s standard, we only need to define it in the capabilities section.
Now let’s add a simple command that prints "hello world” to the Output console. In the driver.py file, add the command.
def hello_world(self):
    return "hello world"
    pass
In the drivermetadata.xml file, add a category for the command and a display name. You need to do this if you want to expose the command in CloudShell Portal.
<Category Name="My Commands">
    <Command Description="" DisplayName="Hello World" Name="hello_world" />
</Category>
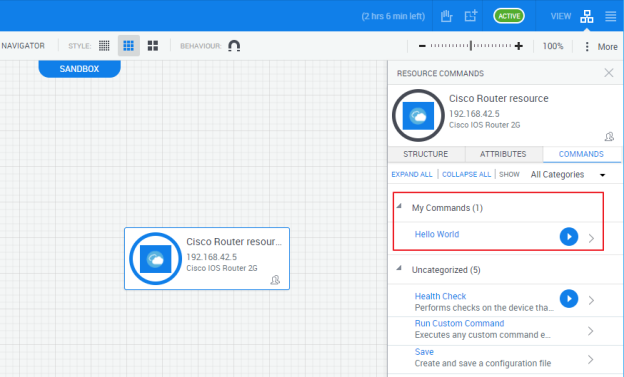
In a CloudShell sandbox, hover over the resource and click Commands. The command is displayed in the resource’s commands pane.
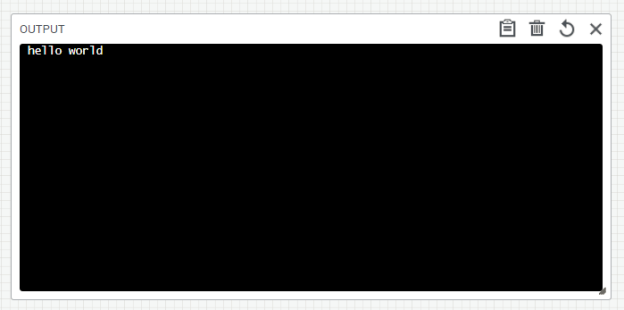
And running the command prints the message to the Output window.
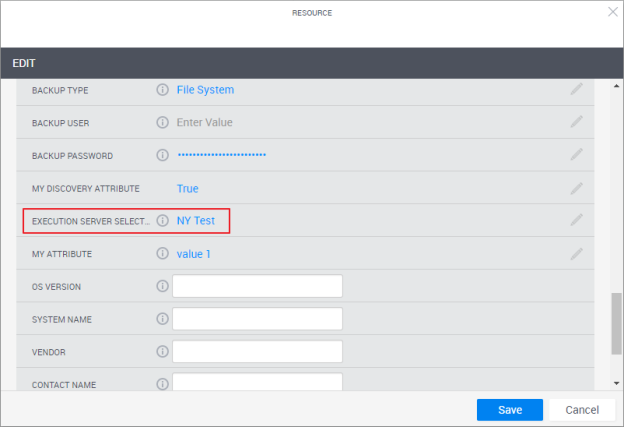
So far in this example, we discussed how to create attributes that are specific to the shell. However, CloudShell also includes global attributes that are not isolated to a specific shell and can be used among different CloudShell elements. You can add these global attributes to shells that are already installed on CloudShell using the SetCustomShellAttribute API method which connects to CloudShell, searches for the shell by name, and adds the attribute to it. You can also do this directly from CloudShell Portal - see Adding custom attributes to a Shell.
For example, this script adds the Execution Server Selector attribute (with a default value) to our shell:
import cloudshell.api.cloudshell_api as api


username = 'admin'
password = 'admin'
server = '192.168.85.9'
domain = 'Global'

session = api.CloudShellAPISession(
    username=username,
    password=password,
    domain=domain,
    host=server
)

session.SetCustomShellAttribute(
    modelName='Cisco IOS Router 2G',
    attributeName='Execution Server Selector',
    defaultValue='NY Test'
)
After shell installation, the attribute is added to the shell’s resources.