Script Commands Visibility and Usability
You can control many aspects of how the orchestration commands appear and behave in CloudShell by editing the script from the Scripts management page.
To demonstrate these capabilities, we’ll create a simple script, which we’ll later customize. The script essentially prints out the parameters it receives and then sets the status of the sandbox to ‘Downloading’.
-
Create a new Python file and name it
customization_test.py. Add the following code:from cloudshell.workflow.orchestration.sandbox import Sandbox
import cloudshell.helpers.scripts.cloudshell_dev_helpers as dev_helpers
def print_parameters_values(sandbox):
"""
:param Sandbox sandbox:
:return:
"""
print sandbox.get_user_param('first_param')
print sandbox.get_user_param('second_param')
def change_reservation_status_to_online(sandbox):
"""
:param Sandbox sandbox:
:return:
"""
sandbox.automation_api.SetReservationLiveStatus(sandbox.id, "Downloading")
def main():
dev_helpers.attach_to_cloudshell()
sandbox = Sandbox()
print_parameters_values(sandbox)
change_reservation_status_to_online(sandbox)
if __name__ == "__main__":
main()noteYou can get the Sandbox id by using sandbox.id. The Sandbox name is also available via the sandbox.name property.
Since this script has imports, you’ll need a
requirements.txtfile and a main.py function. For details, see Script Deep Dive. -
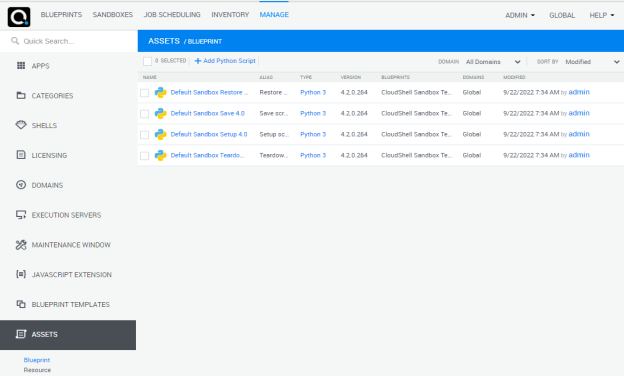
In CloudShell Portal, open the Manage dashboard.
-
Navigate to the Scripts sub section and select Blueprint.
-
Add the script into CloudShell by dragging the script into the Scripts – Blueprint page or add the
customization_test.pyscript. -
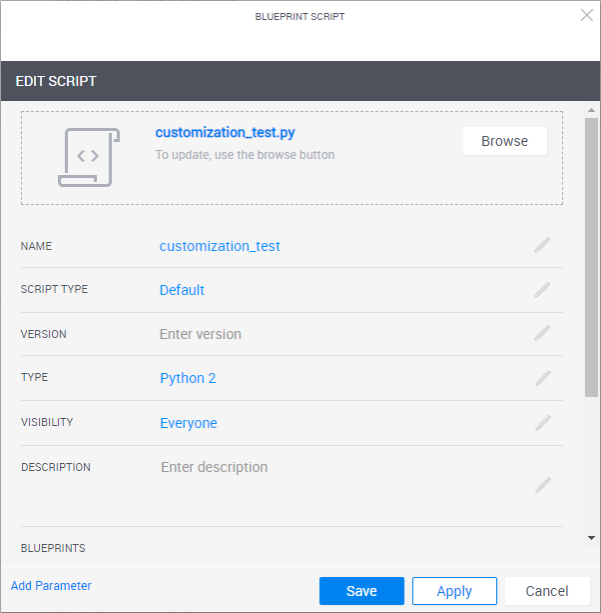
To customize the script, click the Edit button.
Setting display name, descriptions and category
-
You can set the script’s display name or alias by editing the Alias field in the edit form. Note that if you try to execute this script as a command from the API, you’ll still need to reference it by its name.
-
Script Type allows you to set the script as an orchestration script that CloudShell will run accordingly.
-
Use the Type field to select the python version of the script. When the script is executed, CloudShell will create a virtual environment using the selected Python version.
-
Visibility controls who can access this command in CloudShell. Options are Everyone or Admin Only
-
The Description is also easy to set via the edit form. Enter any text here, it will be displayed as a reference under the script name in the commands pane. This does not apply to orchestration scripts.
-
Categories help improve usability by grouping commands with a similar role or domain under a folder in the sandbox’s command pane. This grouping is for visual purposes only and does not affect API calls. For this example, let’s set the category name to ‘Customization’.
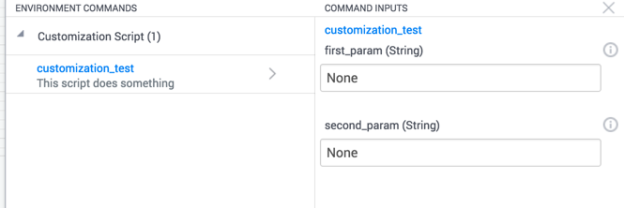
Adding parameters
Our script expects two parameters, but CloudShell has no way of knowing that. We need to add these parameters in this same form.
-
Click the Add Parameter link at the bottom of the form.
-
Set the Name as ‘first_param’ and the Default Value as ‘None’. Note that if the command parameters don’t have default values, they will become mandatory and the user won’t be able to execute the command without filling in values for them.
-
Then, enter a meaningful Description.
-
Repeat the process, this time for the second param, which the script expects to be named "second_param”.
Test the new look and feel
To test the script, we need to add it to a blueprint.
-
In CloudShell Portal, click Blueprints.
-
The Blueprint Catalog is displayed.
-
Create a new blueprint or select an existing one.
-
In the blueprint’s Properties page, associate the script with the blueprint.
-
Reserve the blueprint and open the Commands pane in the sandbox.