Configuring Deployment Paths
In this article, we’ll learn how to set up the App’s deployment paths.
The shell’s deployment paths are defined in the shell project’s Deployments folder. The folder includes a deployment-path.yaml file, which represents a single deployment path. You can create multiple deployment paths for your shell by creating additional copies of the file and modifying their settings.
Note that since Cloud Provider is a 2nd Gen shell, the deployment paths are not available in Resource Manager Client’s Resource Families explorer.
Setting up the deployment type and image
Let’s start by configuring a new deployment path.
-
In the Deployments folder, rename the deployment-path.yaml to the name of the deployment option. For example, "my-deployment-path.yaml”.
-
Open the yaml and locate the following line:
vendor.resource.MyDeploymentPath: -
Replace "MyDeploymentPath” with the new display name of the deployment path (spaces are supported). For example: "My Test Path”.
vendor.resource.My Test Path: -
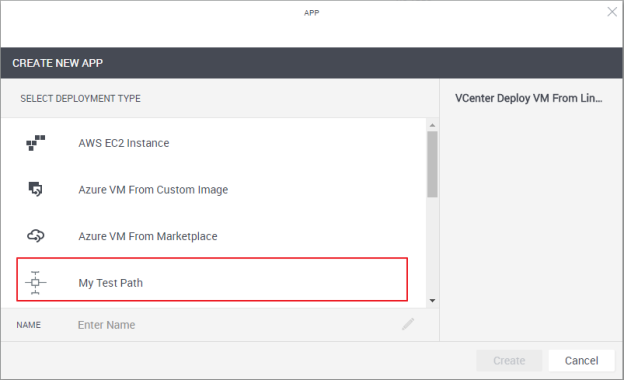
Install the shell on CloudShell and in the Manage>Apps page, create an App template. You should be able to see the new deployment option in the Select Deployment Type area:
We can also change the icon of the deployment path by placing the new image file in the Deployments folder and replacing shell-icon.png in the yaml's artifacts: section with the new file name.
For example, setting image file "my-icon.png”:
artifacts:
  icon:
    file: my-icon.png
    type: tosca.artifacts.File
Adding attributes
Next, add the required attributes.
- You cannot modify an attribute's type and name, nor any attributes that are associated with the shell’s family as this will affect other shells that use this family.
- CloudShell allows upgrading shells with old/deprecated attributes. For details, see Overriding Old/Deprecated Shell Attributes.
Place the cursor at the end of the derived_from: line and press the [Enter] key. Type "properties:” and press [Enter] again. Press the [Tab] key and add the attribute. To make the attribute visible to the user in CloudShell, make sure to include the "tags: [user_input]” line. For example, adding a string attribute called "My attribute”:
node_types:

  vendor.resource.My Test Path:
    derived_from: cloudshell.nodes.CustomDeploymentOption
    properties:
      My attribute:
        type: string
        tags: [user_input]       # supported types are: string, integer, float, boolean, cloudshell.datatypes.Password
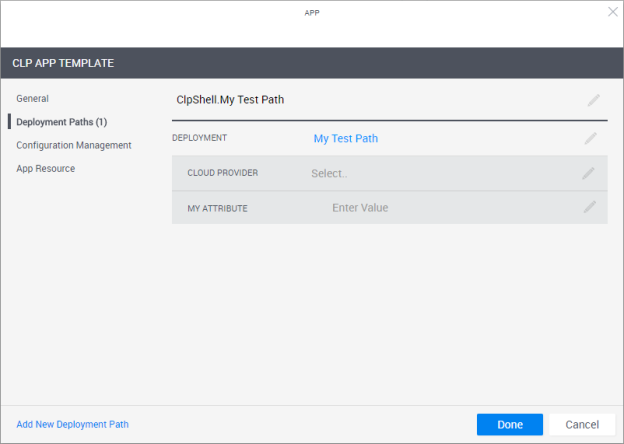
The deployment path should look something like this:
Same as with attributes in the shell-definition.yaml, you can also specify additional details, like default value, description and possible values (constraints property). For example:
My attribute:
  type: string
  default: value 1
  description: "This is my my attribute."
  constraints: value 1, value 2, value 3
  tags: [user_input]
Setting attributes as read only in the blueprint
In some cases, you may want a specific deployment attribute to be unavailable for editing from the blueprint, possibly because it defines critical VM properties, like the image ID. If this is the case, you can set the attribute to only be editable by the admin in the App template. To do so, add the editable_only_in_app_template rule to the attribute. For example:
My attribute:
  type: string
  default: value 1
  description: "This is my attribute."
  constraints: value 1, value 2, value 3
  tags: [user_input, editable_only_in_app_template]
Note that the editable_only_in_app_template rule only blocks admins from editing the attribute value in the blueprint but not in the sandbox, where the attribute is available for editing by design. Regular users cannot edit the attribute in blueprints and sandboxes.
The attribute will be read only in the blueprint.