Importing users into CloudShell from an active directory
The following procedures explain how to import users from your active directory into CloudShell. To enable user import, the ActiveDirectory.Domain configuration key needs to be set - see Configuring CloudShell to import user definitions from an active directory.
Once imported and associated to the relevant CloudShell groups and domains, imported users log into CloudShell using their active directory username and password, and the desired CloudShell domain. In addition, the password of an imported user can only be changed from the active directory itself.
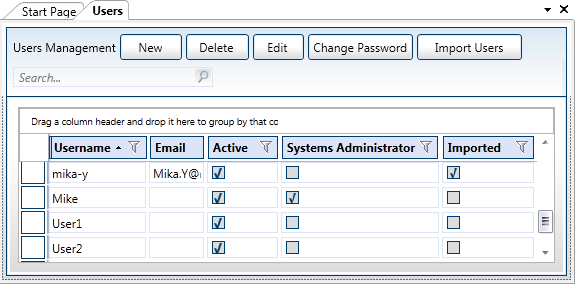
In Resource Manager Client, in the Users tab, imported users have the Imported check box selected (illustrated for user "Mika-y" in the image below).

Importing users from an active directory group
To import users from a specific active directory group:
-
Log in to Resource Manager Client as administrator.
-
In the Admin ribbon, click Users.
-
Click the Import Users button.
-
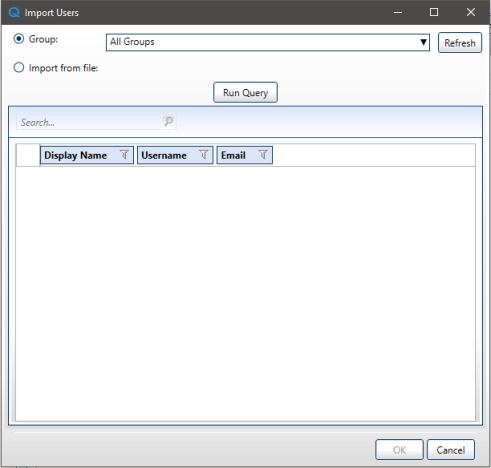
In the Import Users dialog box, select the Group option.

-
Click Refresh to get a full list of groups that exist in the current domain.
-
Select the required group from the Group drop down list or leave All Groups to get all users in the active directory.
-
Click Run Query to get the list of users.
-
Select the users to import. Press the [CTRL]+[A] keys to select all users in the list or press the [CTRL] key to select specific users.
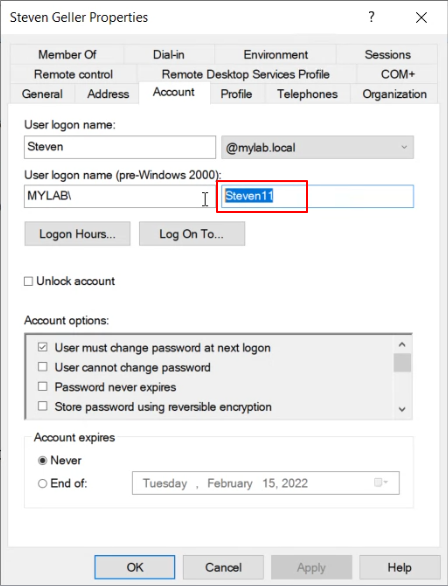
Active Directory users are added as follows:- AD First Name field maps to the CloudShell Username (in user list and auto-import dialog)
- AD Display Name field maps to the CloudShell Display Name (in auto-import dialog)
- AD Pre-win2000 field (SamAccountName) maps to Cloudshell Username.
More...

-
Click OK.
Importing active directory users from a file
You can also import users from an external text file. The file must contain a list of valid email addresses in the active directory, separated with a comma or semicolon.
To import users from a file:
- Log in to Resource Manager Client as administrator.
- In the Admin ribbon, click Users.
- Click the Import Users button.
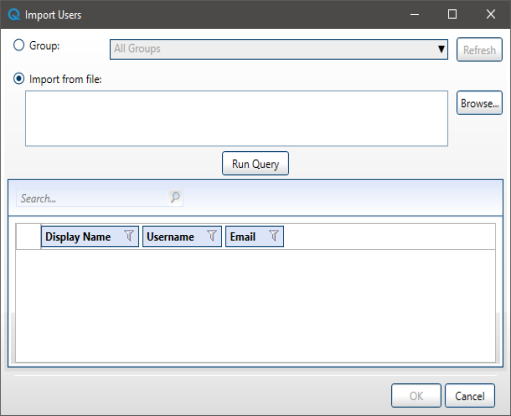
- In the Import Users dialog box, select the Import from file option.

-
Click Browse and select the txt file. The email addresses must be comma or semicolon-separated. For example: jane.d@company.com,john.j@company.com,steve.b@company.com,deb.h@company.com
The file contents are displayed in the text box.
-
Click the Run Query button to get the list of users from the loaded file.
The users are listed in the dialog box. Nonexistent users in the file are not listed.
-
Select the users to import: Press the [CTRL]+[A] keys to select all users in the list or press the [CTRL] key to select specific users.
-
Click OK.
The users are added to the Users Management list from the current domain.