Creating Suites
A suite must have at least one job that has a test, but you can have several jobs, each with different tests. Each job is associated to a CloudShell blueprint, which is reserved when the job is executed. Tests are run sequentially in the order they were added to the job.
To create a suite:
-
In the Job Scheduling dashboard, click Space in the top left corner and select the CloudShell domain.
-
Click + Add New Suite.
-
Enter the suite’s Name (50 characters max) and optionally a Description.
-
By default, suites are executed on demand by the user or automation process. To run on a recurring schedule, expand Advanced Scheduling and set the time interval in Cron syntax.
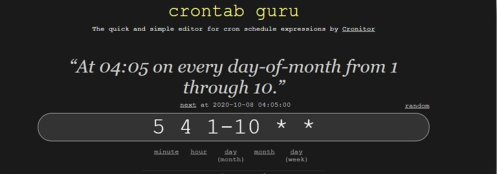
Cron example
For example:
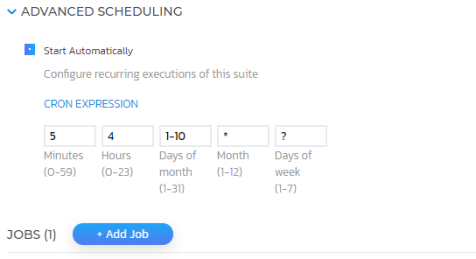
The suite will be triggered as follows:
-
Add a job:
-
Click + Add Job.
-
Enter the job’s Name (50 characters max), Duration (in minutes) and Description (optional). The job’s duration comprises the estimated duration of each of the job's tests, with buffer and provisioning estimates (if the blueprint includes setup/teardown commands).
-
Click the Blueprint
 button and select a blueprint. The suite’s execution will create a sandbox based on this blueprint for this job and run the tests on the sandbox environment.note
Persistent blueprints as well as blueprints that require approval are unavailable for the New Job Scheduling.
ImportantThe New Job Scheduling exposes only global inputs for blueprints. If your blueprint requires other types of inputs that don’t have a default value, the job execution will fail. To prevent this from happening, make sure those inputs have default values.
-
If the blueprint has inputs, the Blueprint Inputs section is displayed. Expand the section and specify the values as appropriate. Global inputs, abstract requirements, additional info and service inputs are supported.
For example, blueprint containing a global input:

-
-
Add tests to the job:
-
Click the Tests
button.Notes- To learn how to use the sandbox's details in Robot tests, see the Using the sandbox's details in a test section below.
- We also have Community grade libraries that allow you to use CloudShell Automation and Quali API to connect to CloudShell and run commands from your Robot tests. For details, see our JSS-Robot-Test-Samples GitHub repo.
-
In the Add a Test pane on the right, search for a suitable test, click the test’s name and set the test’s Duration (in minutes).
-
In the Additional CMD Parameters field, optionally specify parameters to pass to the test's execution. The parameters must be in Robot test execution command line format.
For example:
-D 'My doc' -v my_var:120 -v my_var2:10tipTo use variables from an external file in the test, declare the variables python file in the test itself.
For example:
*** Settings ***
| Variables | variables_file.py -
Repeat to add additional tests.
Notes- The best practice is to set each robot suite (single robot test file) to run a single test. Setting a robot suite to run multiple tests is supported. However, if one of the tests fails, the New Job Scheduling will not be able to identify which test failed.
- However, if you wish to add multiple tests to the job, make sure all of the tests' dependencies are included in the
requirements.txtfile that will be used when executing the first test in the job. For details, see Setting Up a Test Repository.
-
-
Add additional jobs, as appropriate.
-
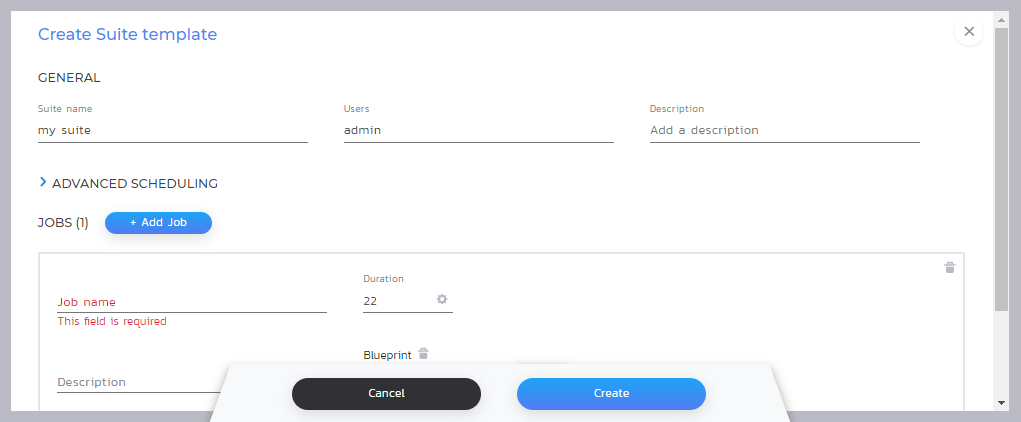
Click Create. The suite is displayed in the Job Scheduling dashboard.
noteIf the suite is not created, it’s probably because you didn’t specify some mandatory details. Scroll up and fill in the details marked in red. For example:
Using the sandbox's details in a test
This section explains how to configure your Robot Framework tests to use details from the sandbox.
This is achieved using the sandbox object, which CloudShell passes automatically to the tests as a variable. The object includes details about the sandbox, such as sandbox id, end time, components (resources, Apps, services), connections and inputs.
Sandbox object example
"sandbox": {
    "id": "uuid",
    "end_time": "datetime (iso 8601)",
    "teardown_time": "datetime (iso 8601)",
    "global_inputs": [
      {
        "name": "string",
        "value": "string"
      }
    ],
    "additional_inputs": [
      {
        "name": "string",
        "value": "string",
        "resource_name": "string"
      }
    ],
    "abstract_requirements": [
      {
        "name": "string",
        "value": "string",
        "resource_name": "string",
        "type": "string"
      }
    ],
    "service_inputs": [
      {
        "name": "string",
        "value": "string",
        "resource_name": "string"
      }
    ],
    "resources": [
      {
        "name": "string",
        "address": "string",
        "full_address": "string",
        "family": "string",
        "model": "string",
        "blueprint_alias": "string",
        "connected_to": "string"
      }
    ]
  }
Connectivity context that is passed into tests
{
    "connectivity":
        "server_address: .. ,
        "cloudshell_api_port: .. ,
        "cloudshell_api_scheme: .. ,
        "quali_api_port: .. ,
        "admin_auth_token: .. ,
        "use_webapi_endpoint: .. ,
}
Usage examples
Robot test that uses the sandbox's id, global input and value:
*** Settings ***
Library    Collections

*** Test Cases ***
Print sandbox id and 1st global input
    print sandbox id ${sandbox.id}
    print 1st global input ${sandbox.global_inputs}

*** Keywords ***
    print sandbox id
    [Arguments] ${id}
    Log To Console ${id}
    print 1st global input
    [Arguments] ${global_inputs}
    ${num} = Get From List ${global_inputs} 0
    Log To Console  ${num.value}