Configuring Portal Load Balancing
To be able to communicate in a load balancing environment, start by configuring all web servers. This section describes how to enable communication between IIS on the load balancing server and it should be configured on load balancing servers using Windows Server Manager.
To configure all web servers to communicate in a load balancing environment:
-
Click Start > Administrative Tools > Server Manager.
-
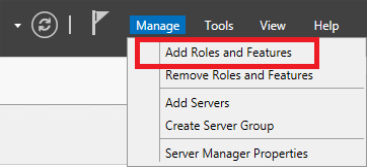
Click Manage and then select Add Roles and Features.

-
In the Before You Begin tab, click Next.
-
In the Installation type tab, select Role-based or feature-based installation.
-
In the Server selection tab, select the server.
-
In the Server Roles tab, select the** Web Server (IIS)** option.
-
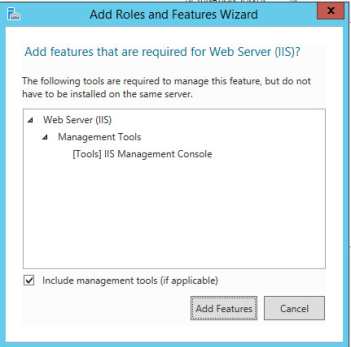
In the Add Roles and Features Wizard, click Add Features.

-
In the Feature tab click Next.
-
In the Web Server Role tab click Next.
-
In Role Services, expand the Application Development section and select the Management Tools section.
-
In the window, click Add Feature, then click Next.
-
Click Install.
-
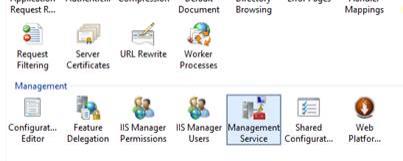
Open IIS and under the IIS server configurations, select Management Service.

-
Stop the Management Service.
-
Select the Enable remote connection option and click Apply.
-
Start the Management Service.
-
Repeat steps 1-16 for each Portal server.