Add OpenStack Cloud Provider Resource
The OpenStack 2nd Gen cloud provider enables the deployment of OpenStack instances from images. CloudShell supports OpenStack releases Ocata, Pike, Queens, Rocky, Stein, Train, Ussuri, Victoria and Wallaby.
- The OpenStack 2nd Gen shell is available for download from Quali Repositories.
- OpenStack elements created by the CloudShell management network should not be altered as this may cause unexpected behavior.
To add an OpenStack cloud provider resource:
-
Log in to CloudShell Portal as administrator.
-
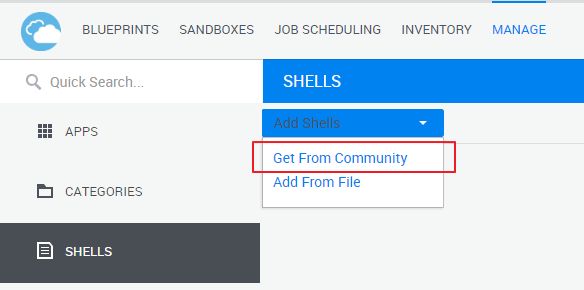
Import the OpenStack 2G shell into CloudShell. For details, see Importing Shells.
-
In the Inventory dashboard, in the Resources tab, click the folder in which you want to create the resource.
-
Click + Add New.
-
In the Create New Resource dialog box, select the OpenStack Cloud Provider Shell 2G cloud provider template.
-
Enter a Name for the OpenStack resource.
noteThe resource's name has a limit of 100 characters and can only contain alpha-numeric characters, spaces, and the following characters: | . - _ ] [
-
Enter the IP Address of the OpenStack server that will be used to deploy the virtual machines.
-
Click Create.
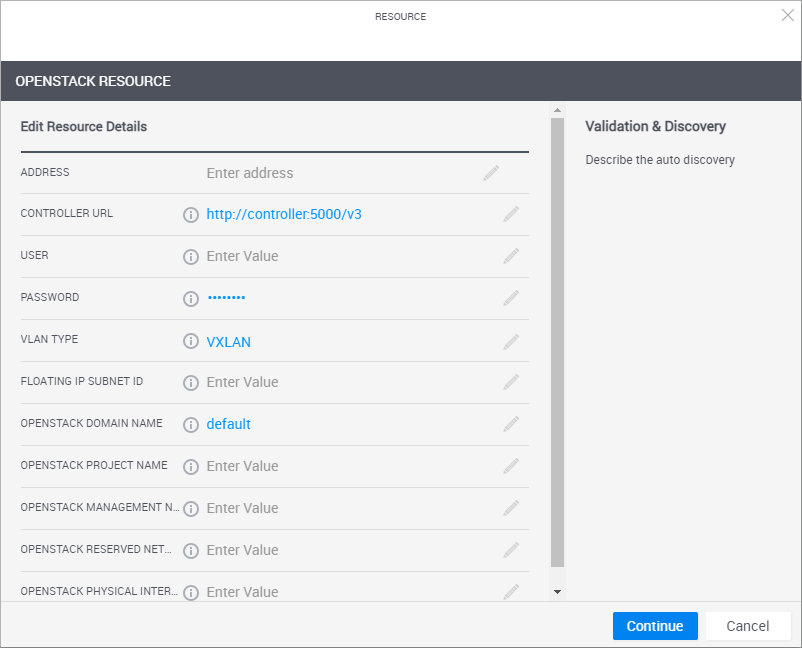
The Resource dialog box is displayed.
-
Enter the required information.
Attribute Description Controller URL OpenStack Keystone Controller URL endpoint address. For example: http://controller:5000/v3.
Displayed in OpenStack portal>API Access page>Identity value).
OpenStack Domain Name OpenStack domain to use. OpenStack Project Name OpenStack project in which CloudShell will create the instances. OpenStack Management Network ID UUID of the manually created CloudShell management network (for assistance identifying your management network, contact your OpenStack admin). This network will be used to configure the communication between the Sandbox instances and the CloudShell components. For example: "c14241d2-376c-4fb3-8d1e-61f5c1408448"
The UUID can be found in the Horizon user interface or in OpenStack portal>Network>Networks page>click the network and copy the ID.
Password OpenStack user's password User OpenStack user on the OpenStack server OpenStack Reserved Networks Comma separated list (,) of reserved networks. vNICs configured to these networks will not be used for instance connectivity.
noteIdeally, one of the following three ranges should be free: 10.0.0.0/8, 172.16.0.0/16, 192.168.0.0/16
VLAN Type (VLAN / VXLAN) The VLAN technology to use for connectivity to/from this cloud provider. Floating IP Subnet ID UUID of the external network subnet that will allocate floating IDs to the OpenStack instances, to allow external connectivity into those instances. For additional details, see OpenStack Configuration Requirements.
Displayed in OpenStack portal>Network>Networks page>Subnets tab>select the subnet>ID value. For assistance identifying your Floating IP network, contact your OpenStack admin.
OpenStack Physical Interface Name (Not required if you set the VLAN Type attribute to VXLAN) The physical interface mapping name to use when configuring OpenStack connectivity.
The physical interface can be found under the connectivity provider configuration in your OpenStack plugin's agent file. For example:
-
For Linux Bridge plugin:
/etc/neutron/plugins/ml2/linuxbridge_agent.inifile >[linux_bridge]configuration section >physical_interface_mappingsattribute.For example:
physical_interface_mappings = public:em1,office:p1p2,quali:em2. -
For Open vSwitch plugin:
/etc/neutron/plugins/ml2/openvswitch_agent.inifile >[ovs]configuration section >bridge_mappingsattribute.For example:
bridge_mappings = public:br-vlan.
Behavior During Save (Optional) (Applies to the Save and Restore paid add-on) The VM's state while the sandbox is being saved. Options are Remain Powered On and Power Off.
- Inherit: (Default) Uses the setting defined on the vCenter cloud provider resource
- Remain Powered On: The VM will remain powered on during the saving state.
- Power Off: If the VM was powered on before the sandbox entered the saving state, the VM will shut down (power off) for the duration of the save.
noteAfter save has ended, the VM returns to its state prior to saving, regardless of the behavior during the save.
If this field is left empty, the default value is Remain Powered On.
Execution Server Selector (Optional) This attribute points to a pre-defined group of execution servers (grouped by a common Execution Server Selector value). To make the association, enter the same value you specified on the execution server.
This attribute is typically used for different sites or domains. For additional information on managing App deployments per domains, see Managing Private Cloud Apps in Domains.
-
-
Click Start Discovery to validate the OpenStack settings.
When the discovery process completes, a confirmation message is displayed. The resource is displayed in the Inventory dashboard in CloudShell Portal and in Resource Manager.
Apps can now be added using the OpenStack resource. For additional information, see Adding App templates.
To customize the App deployment types and publish App orchestration parameters, see Customizing App Deployment Types