Adding and Configuring Resources in Resource Manager
This article only applies to resources based on 1st Gen shells. While CloudShell supports 1st Gen shells, we recommend using 2nd Gen shells, which offer enhanced shell management capabilities. For details, see Shells Overview.
This article explains how to manually create resources in Resource Manager, including sub-resources (such as ports), connections, attributes, and resource settings.
Drivers, groups and domains must be associated to the resources separately. For additional information, see Associating a Driver with a Resource and Adding/Removing Resources from a Domain .
It is recommended to add resources based on 2nd Gen Shells via the CloudShell Portal, to enjoy the full range of CloudShell capabilities. For additional information, see Shells Overview.
Adding resources to Resource Manager
To create a new resource:
-
In the Resource Explorer pane, right-click the folder where you want to add the new resource and select New > Resource from the context menu.
Or -
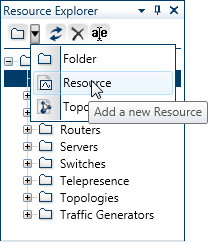
In the toolbar, click the down arrow of the folder button and select Resource from the context menu.
-
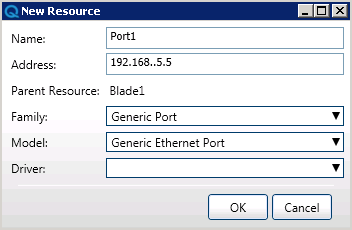
In the New Resource dialog box, enter the resource name.
Note: The resource's name has a limit of 100 characters and can only contain alpha-numeric characters, spaces, and the following characters: | . - _ ] [
-
Fill in the address. Make sure there are no spaces before or after the address.
-
Select the resource Family, Model, and Driver from the dropdown lists and click OK to add the new resource to the Resource Explorer pane.
Adding sub resources to a resource
To add sub-resources to a resource:
-
In the Resource Explorer pane, right-click the resource and select Configuration from the context menu.
The Configuration tab is displayed.
-
Right-click the resource in the Internal Resources explorer, and select New from the context menu.
-
In the New Resource dialog box, enter the resource name.
Note: The resource's name has a limit of 100 characters and can only contain alpha-numeric characters, spaces, and the following characters: | . - _ ] [
 .
. -
Fill in the address.
-
Select the resource Family, Model, and Driver from the dropdown lists and click OK.
-
Press Ctrl + S to save the changes.
When you select a sub-resource in the Internal Resources Explorer, the Parameters and Details sections update to display resource details for the selected sub-resource.
Configuring sub-resources
To configure a resource:
-
In the Resource Explorer pane, right-click a resource and select Configuration from the context menu.
The Configuration tab is displayed.
-
In the Parameters section of the resource's Configuration tab, you can update the resource name, description, and address.
You can also select which driver to associate with the resource.
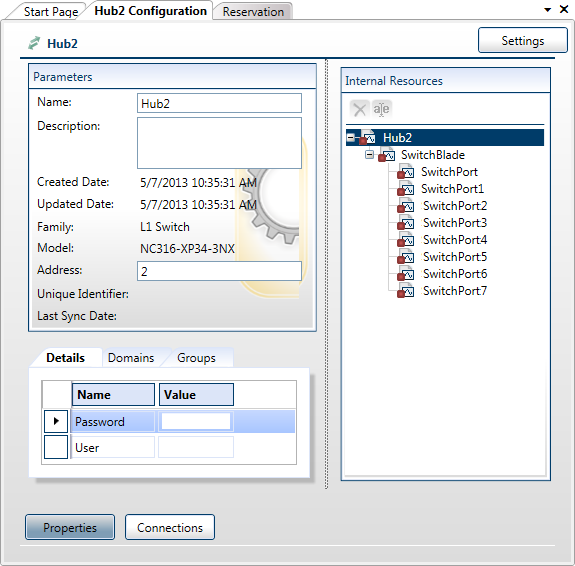
- The list of available drivers for a resource is defined by the inheritance settings of the parent model or resource family.
- Select the Details tab to modify any overridable attribute values.
- Select the Domains tab to modify resource allocation settings.
- The Groups tab displays which groups are associated with the resource, and the access level for each group.
- In the Resources Explorer pane, you can add, edit, and remove internal resources. Additional actions are available from the resource's Settings and Configuration tabs from which you can exclude, include and sync/autoload the device's structure.
Updating resource details
You can update the following details: resource name, description and address, attribute details, domains, sub resources, and internal mappings.
To update resource details:
-
In the Resource Explorer pane, right-click the resource and select Configuration from the context menu.
The Configuration page is displayed.
-
Make the necessary changes in the Configuration and Settings tabs.
-
Save your changes.
Updating attribute values
To update an attribute's values:
-
In the Resource Explorer pane, right-click the resource and select Configuration from the context menu.
The Configuration tab is displayed.
-
Click the Details tab.
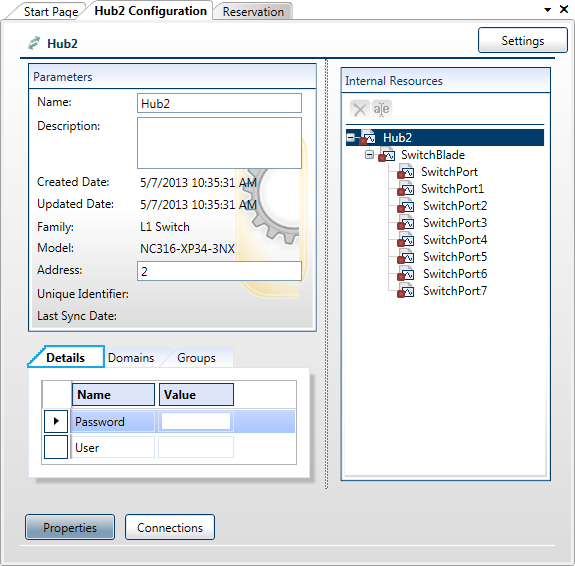
- Specify the attribute's values.
- Press Ctrl + S to save the changes.
Some attribute values will be read-only, depending on the inheritance and override rules that you defined for the resource family and model.
The attribute inheritance feature will be deprecated in an upcoming release. Please do not use this setting. For additional information, see Configuring attribute inheritance settings or contact Quali Support.
You cannot update attribute values for active resources when they are being shared.
Defining resource connections
To define physical connections (usually cables) between resource ports:
-
In the Resource Explorer pane, right-click the resource and select Configuration from the context menu.
The Configuration tab is displayed.
-
Click the Connections button at the bottom of the Configuration tab.
The Connections page lists all of the ports for the selected resource.
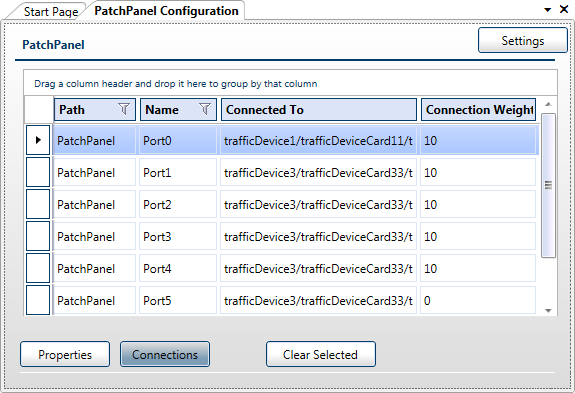
- The Path column displays the full path of a specific port.
- The Name column displays the name of the port.
- The Connected To column contains the full path of the target port to which the source port is connected.
- The Connection Weight value is taken into account during abstract blueprint resolution.
To create a new connection between ports:
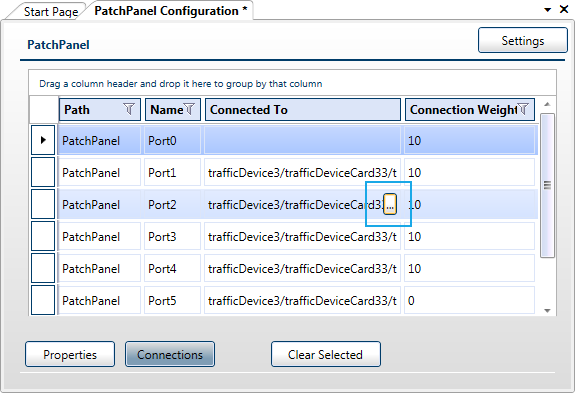
- In the Connections page, hover over the Connected To cell of the relevant port, and click the Ellipsis icon to open the Direction menu.
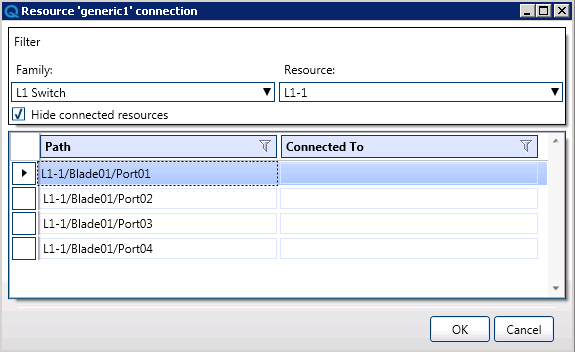
- In the Resource connection dialog box, select the Family and specific Resource Parent from the top dropdown lists.
-
Select the connecting port from the list.
-
Click OK to add the connection.
The relevant ports are displayed on the bottom grid in the Connected To column.
To remove existing connections:
- In the Connections page, select the required ports and click Clear Selected.
To apply the changes:
- In the Home ribbon, click the Save button.
You cannot update connections for resources with conflicting active sandboxes.